A Lesson in Metallurgy and Transmutation
A Lesson in Metallurgy and Transmutation
Have I outwitted centuries of alchemy?


For centuries alchemists, magicians, and blacksmiths have sought to transform common metals such as lead into gold. The prospects of unlimited gold served to corrupt and inspire generations of men before me. While I’m sorry to disappoint my readers by saying, no I have not cracked the secret in turning lead into gold, I perhaps have found something even better. Turning plastic into aircraft grade titanium, or well at least making it look like it.
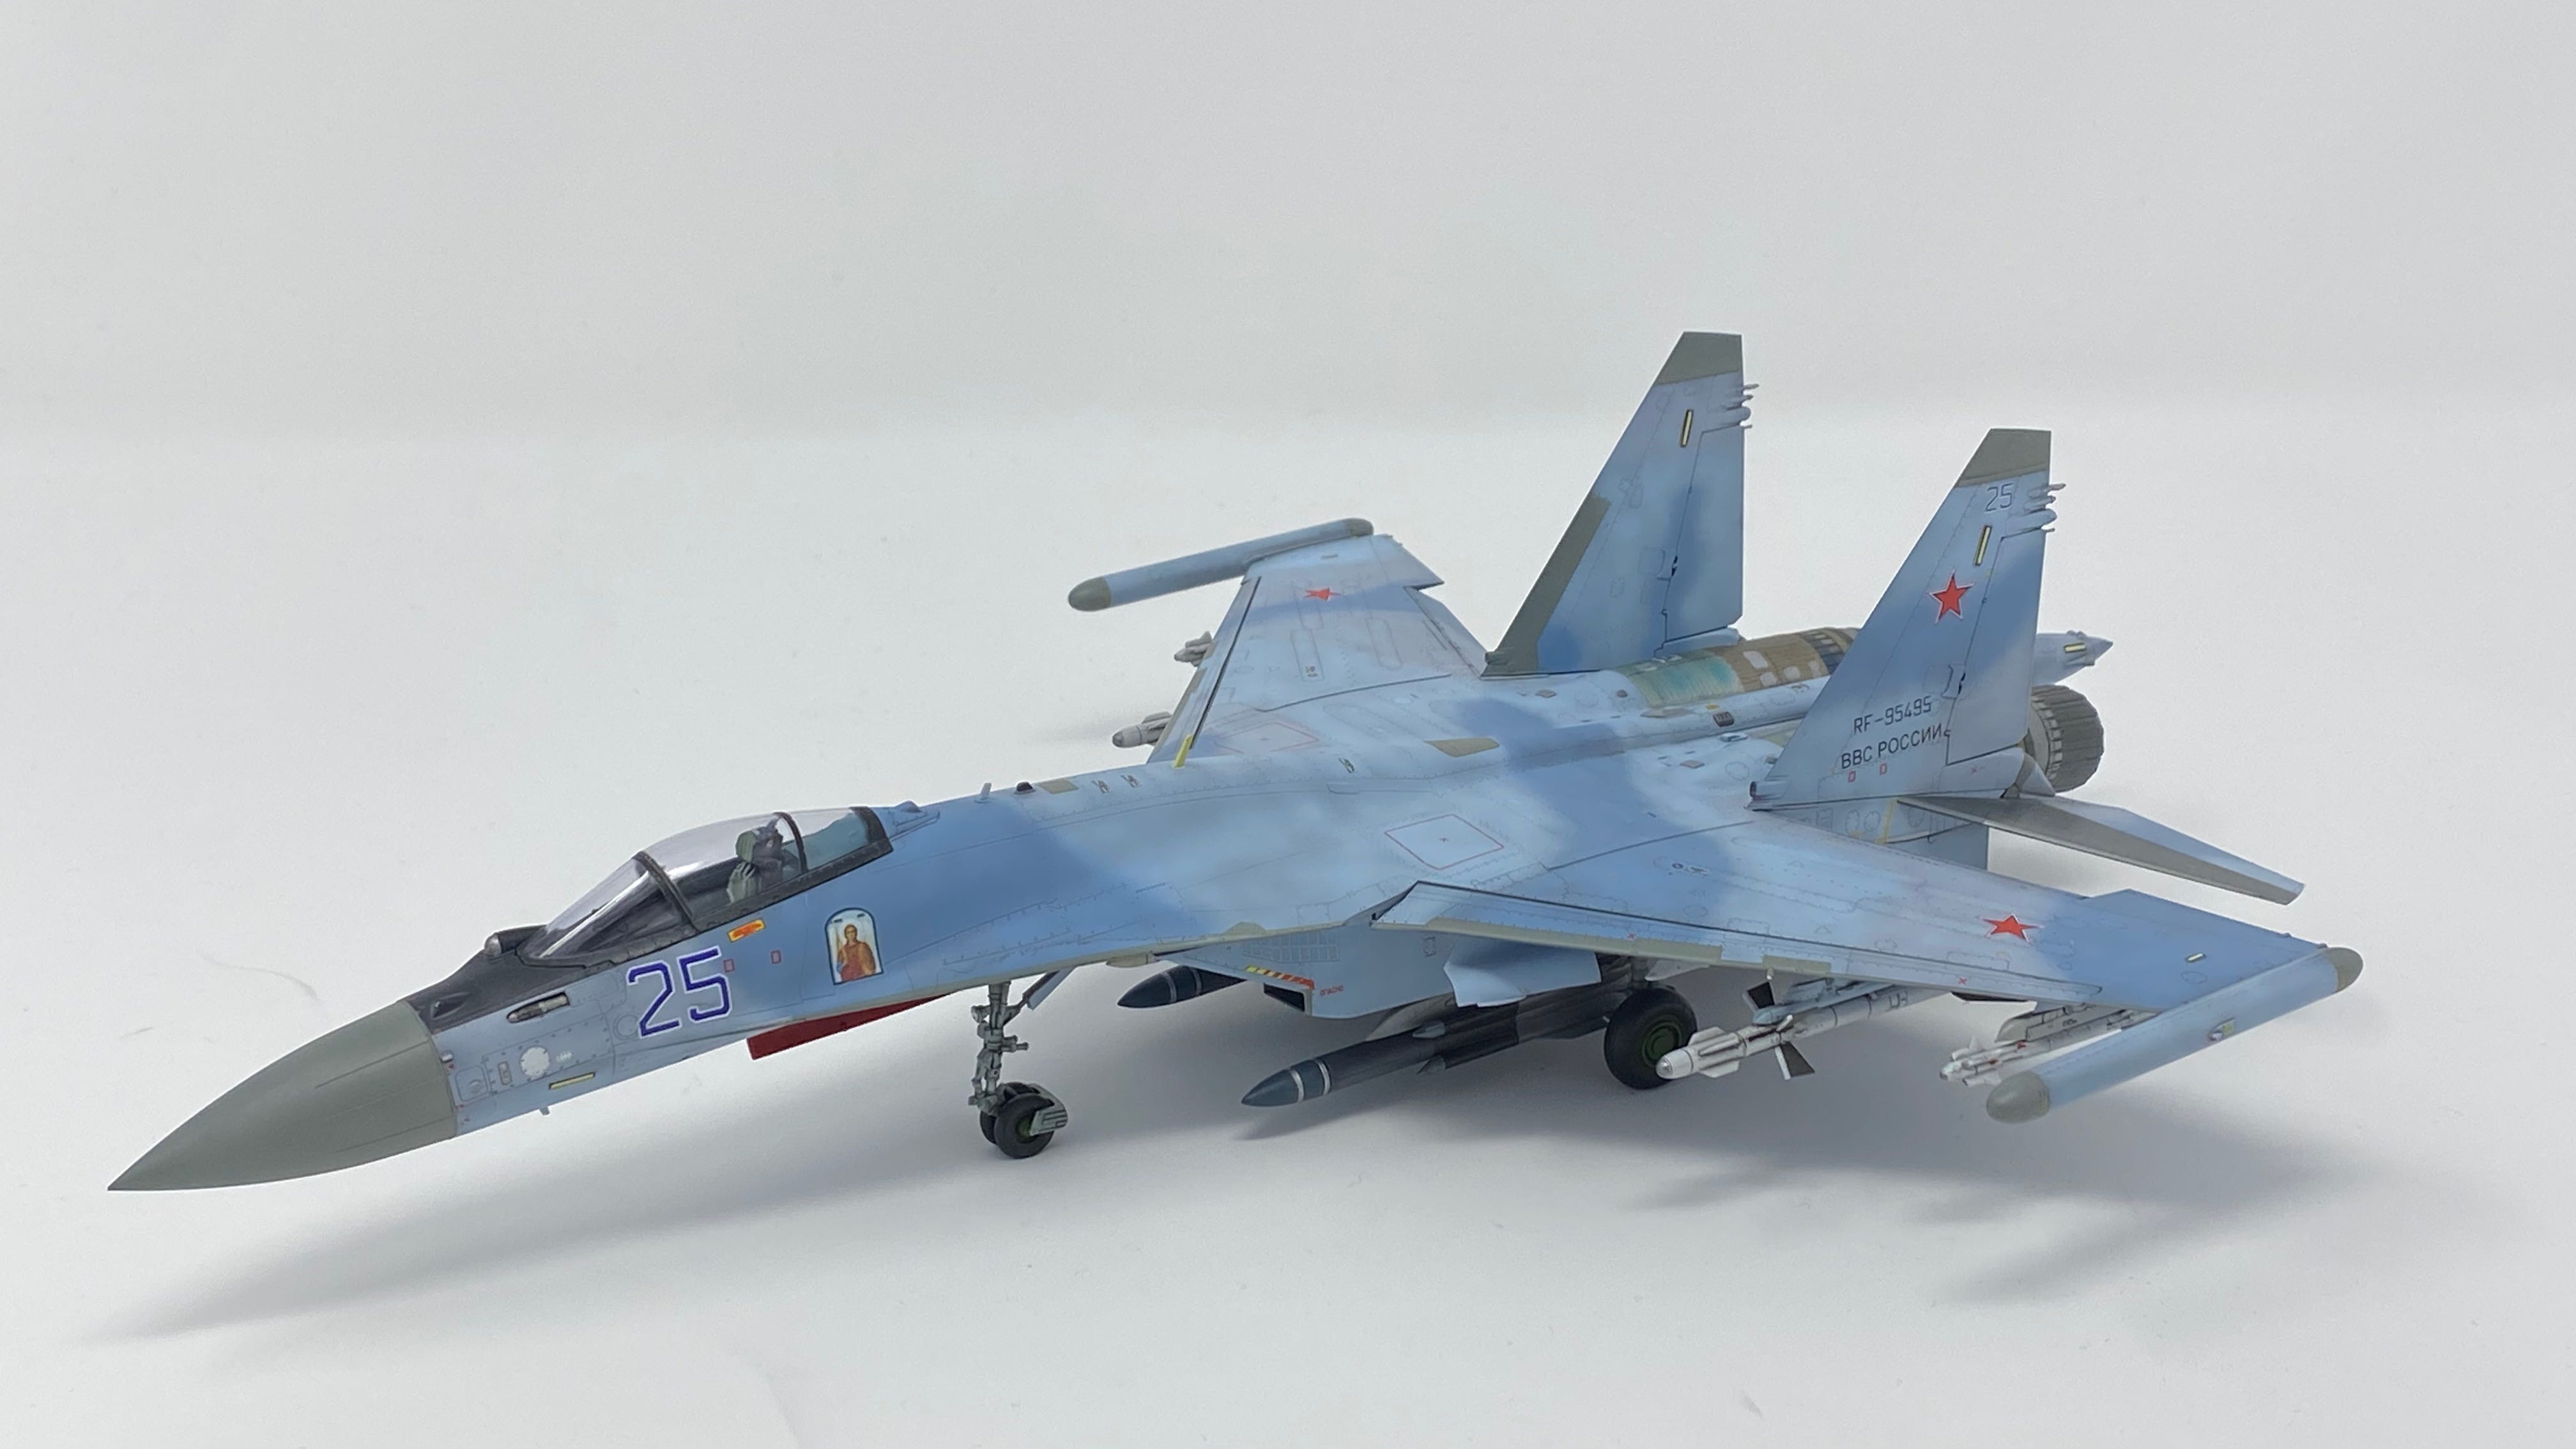
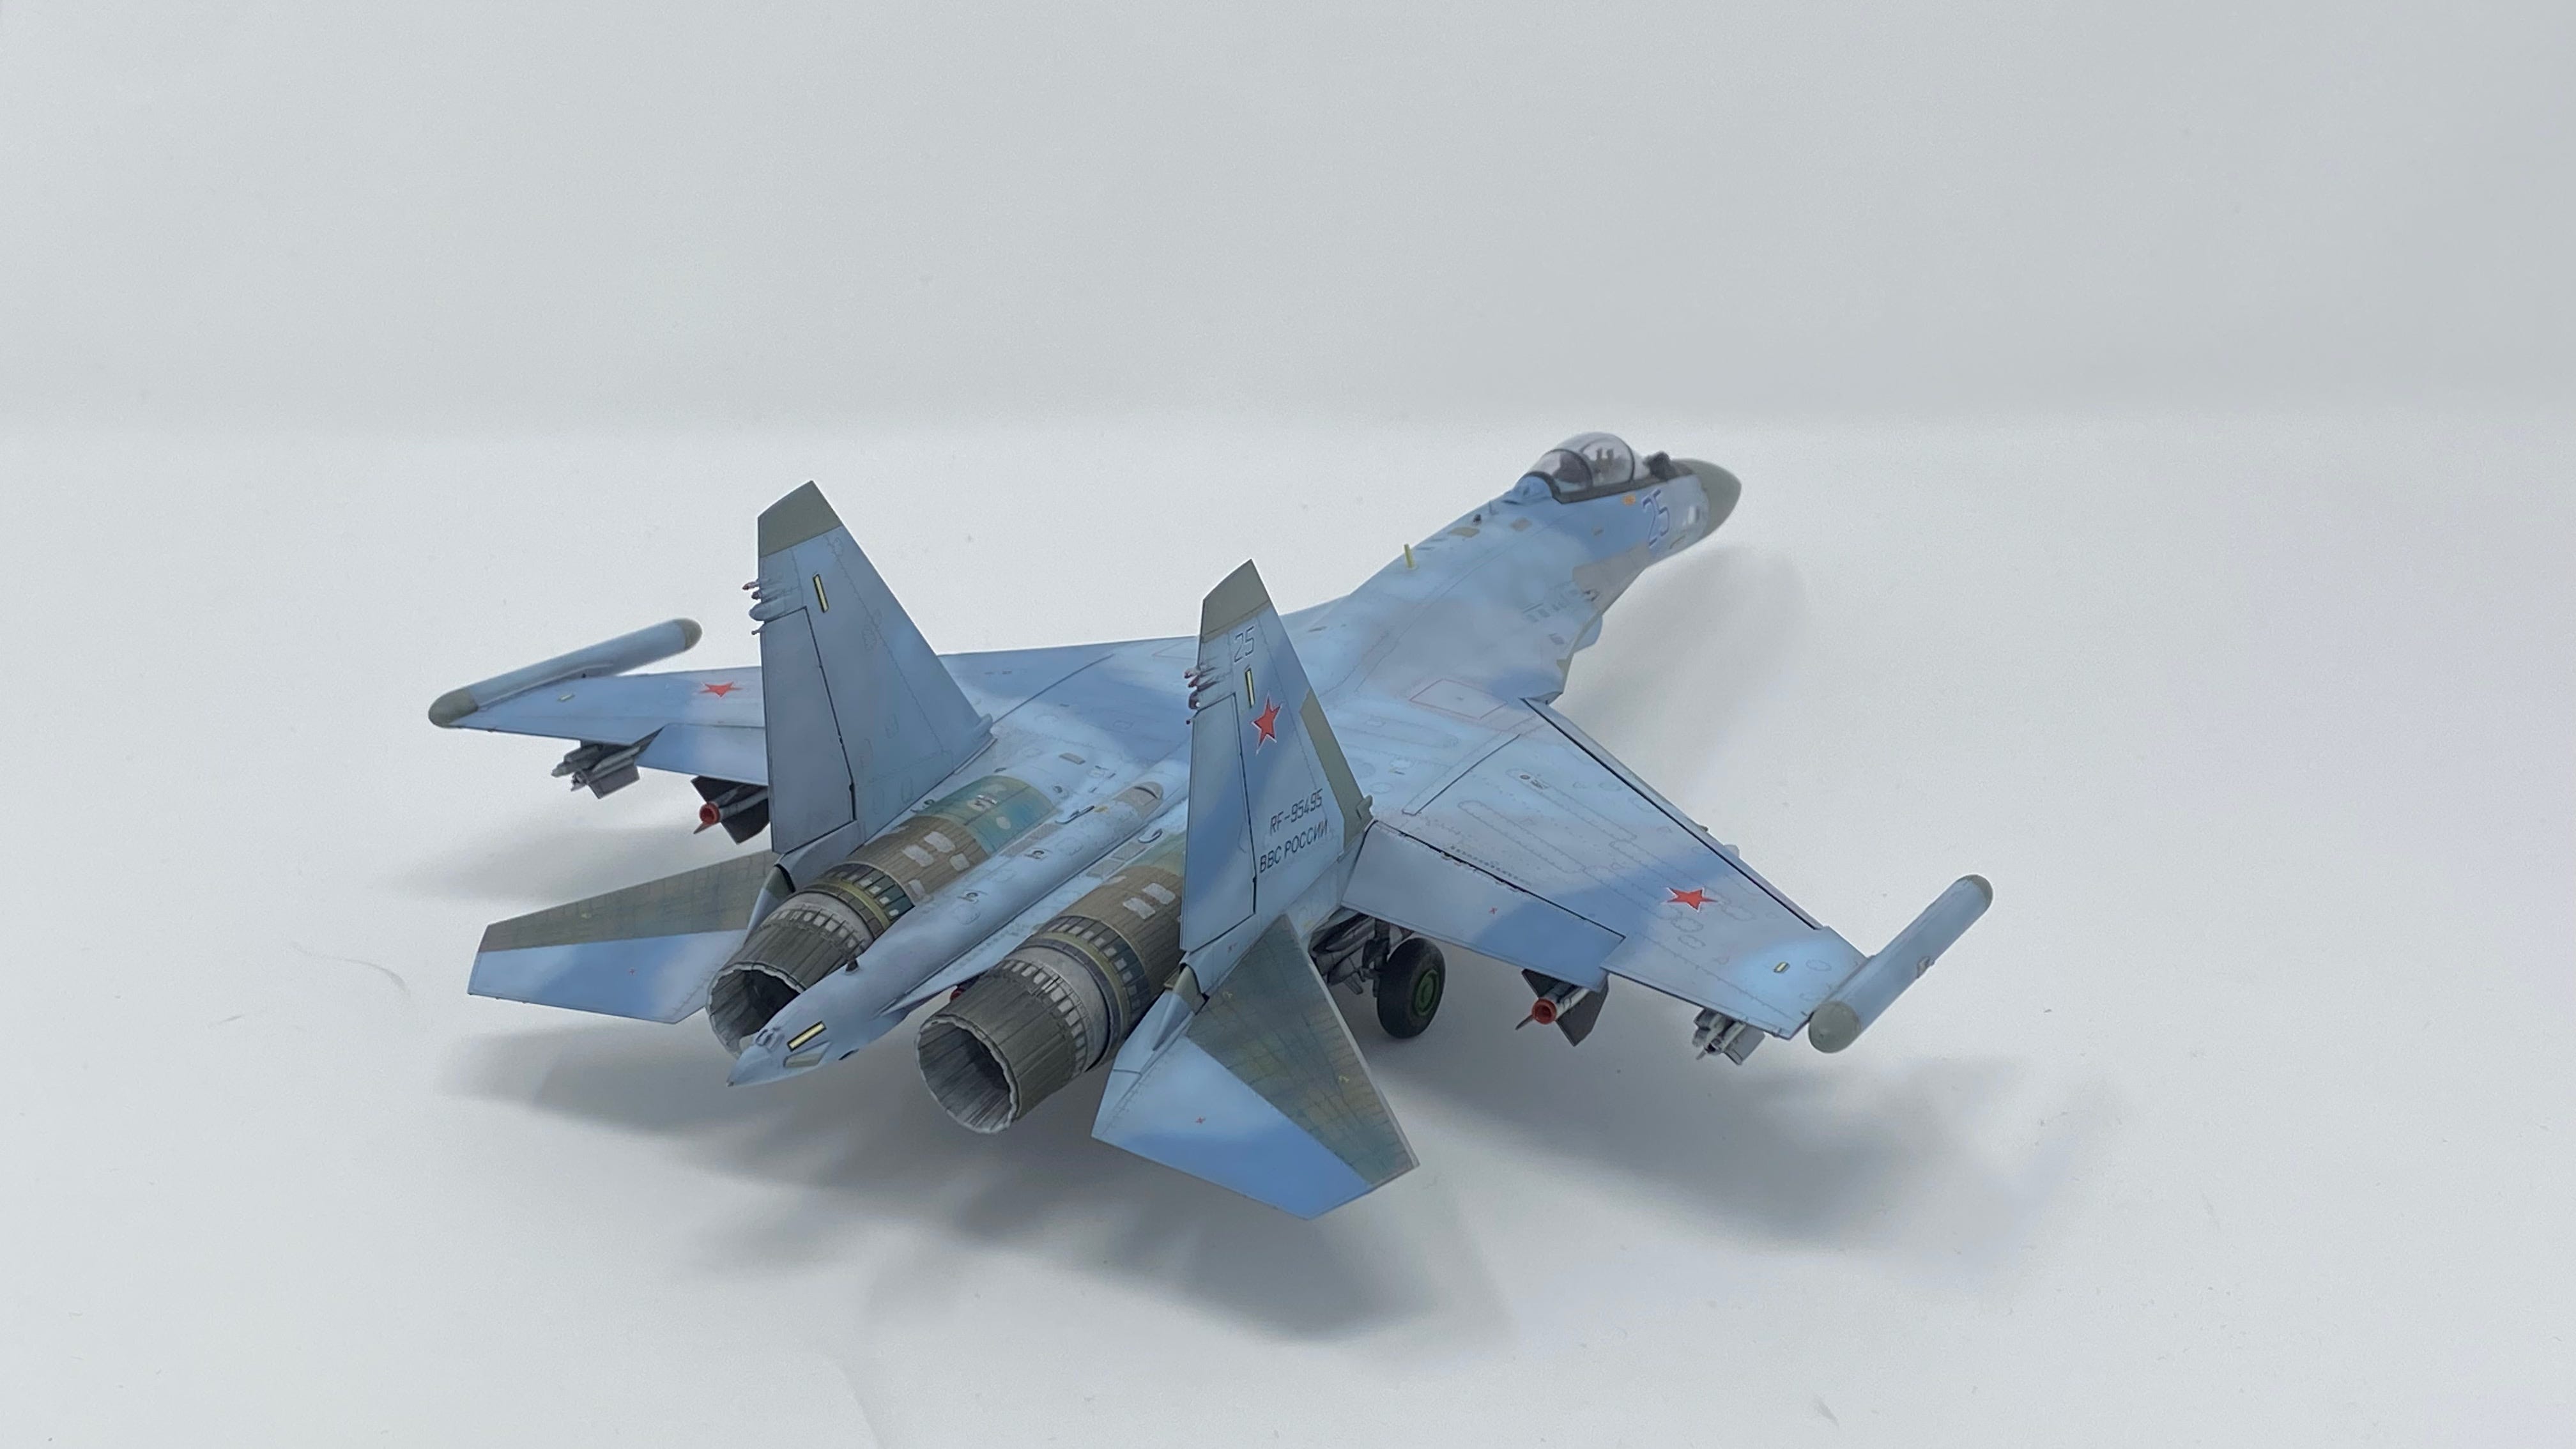
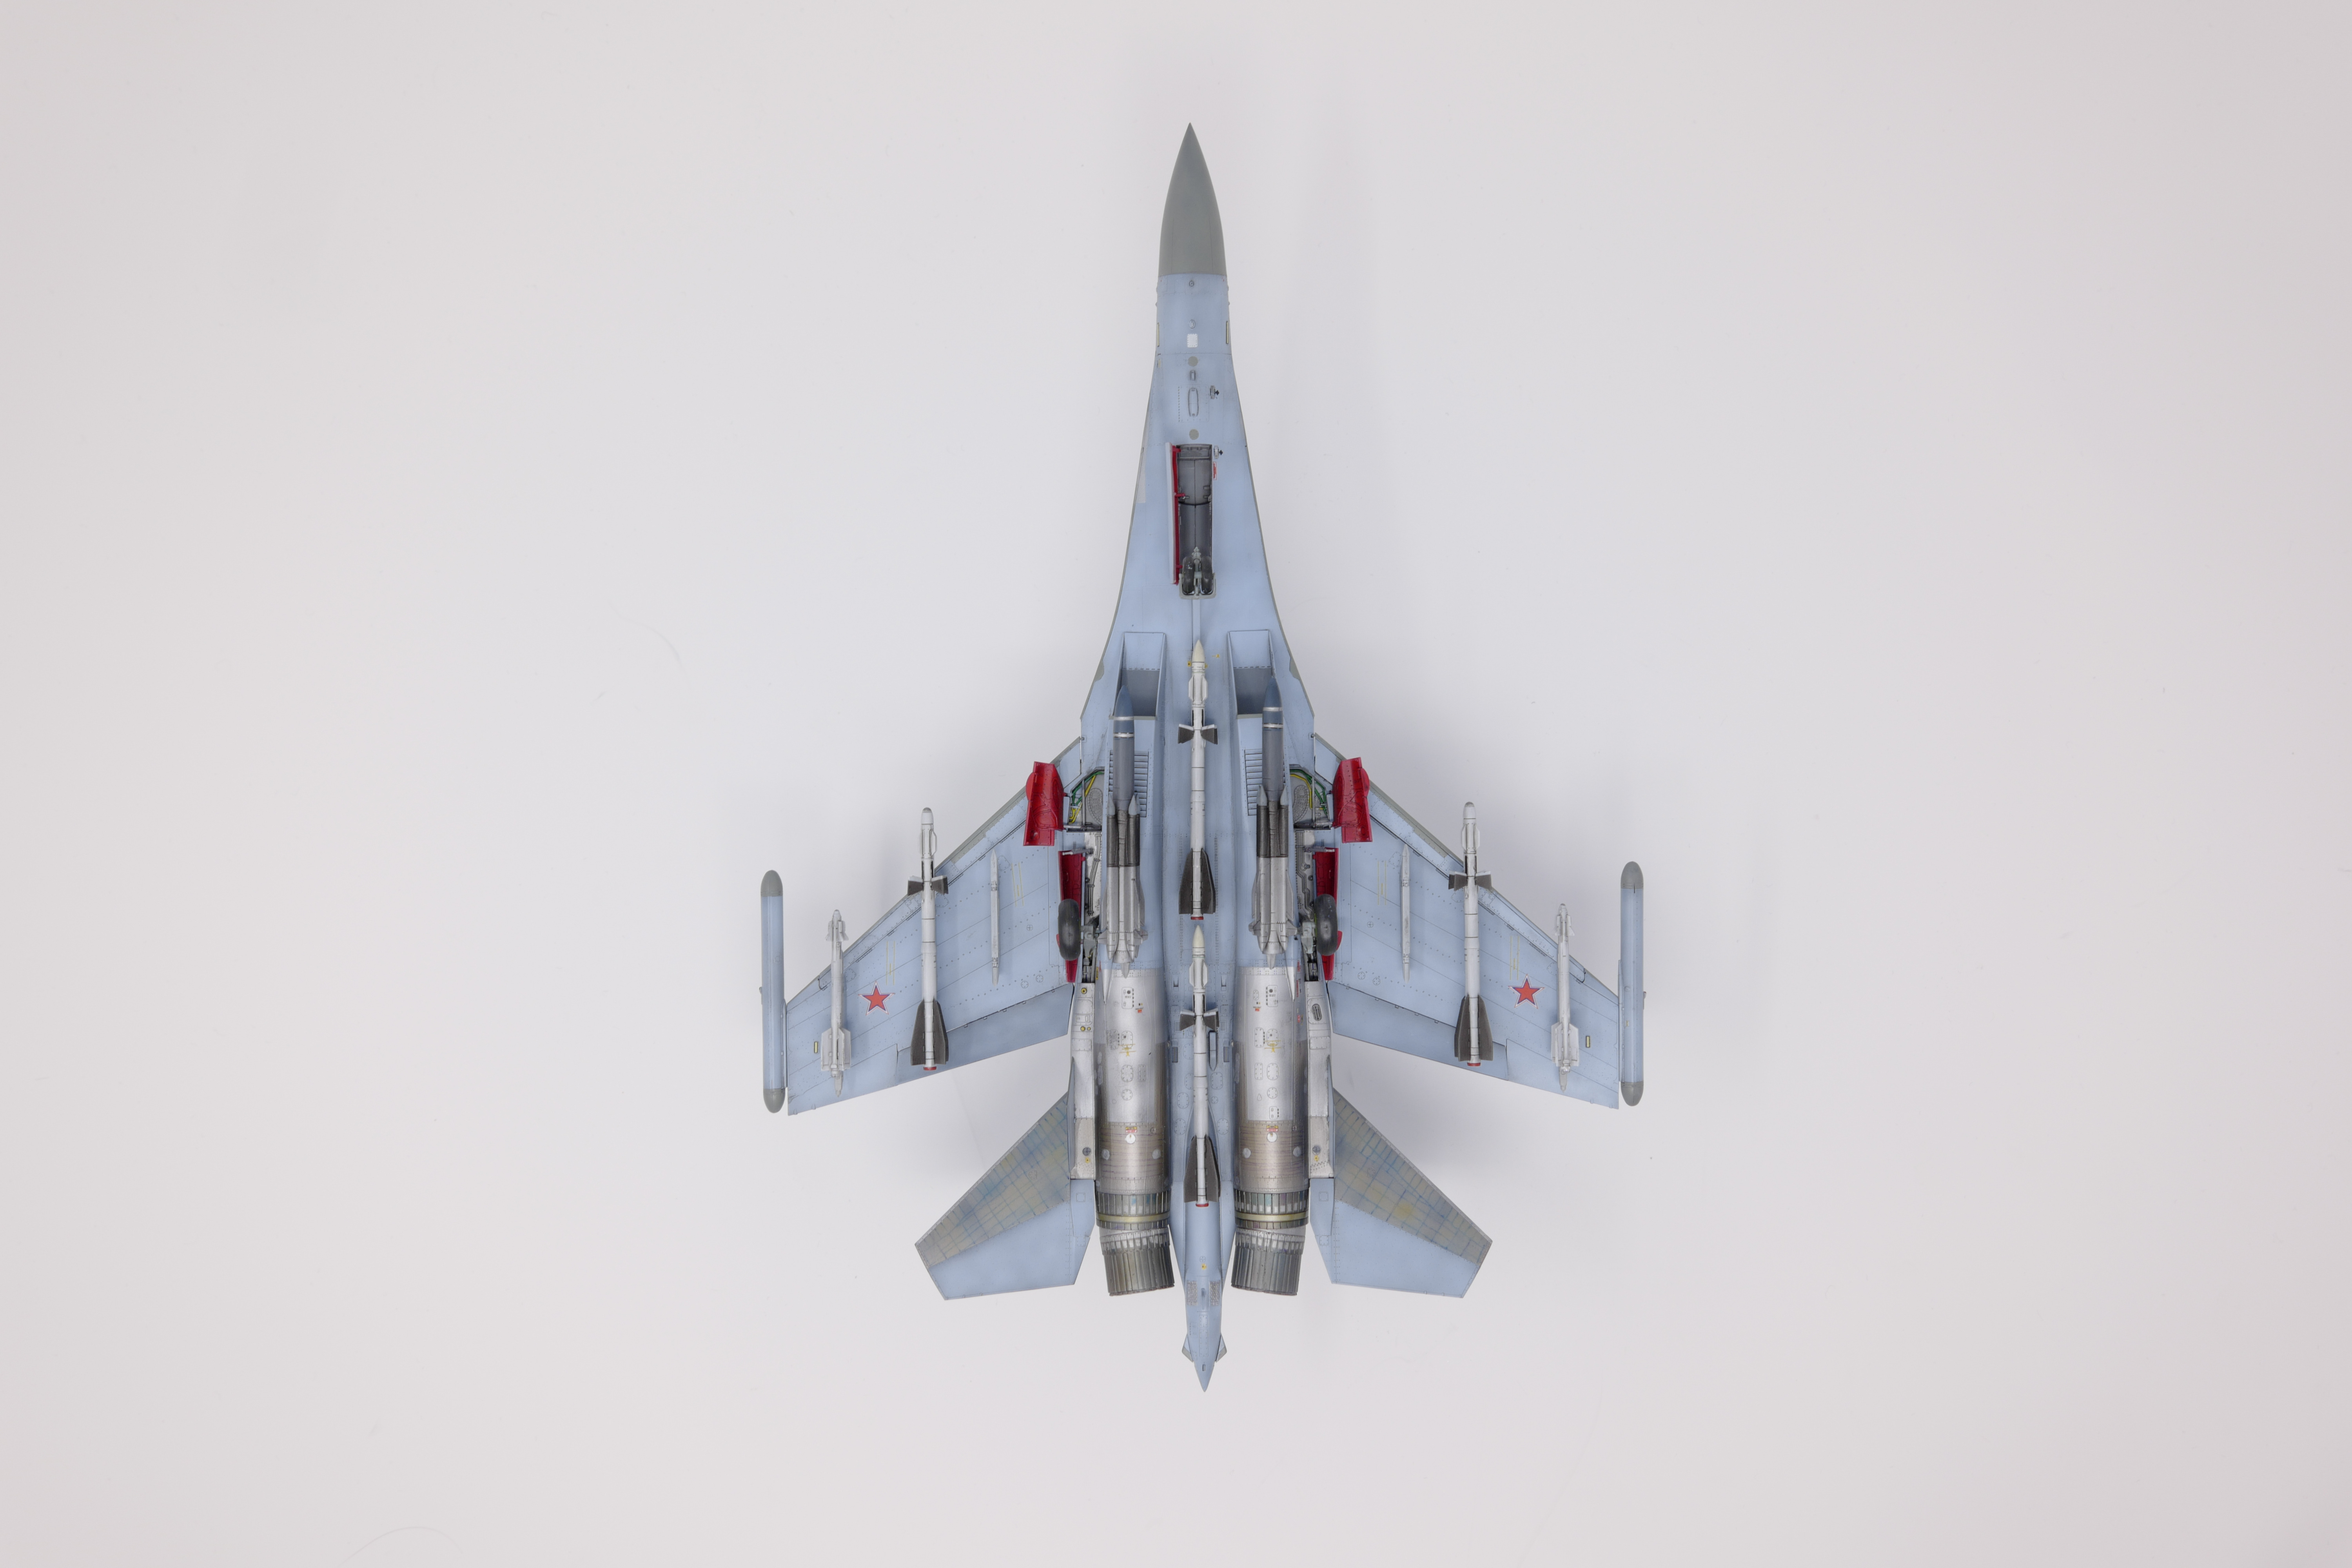
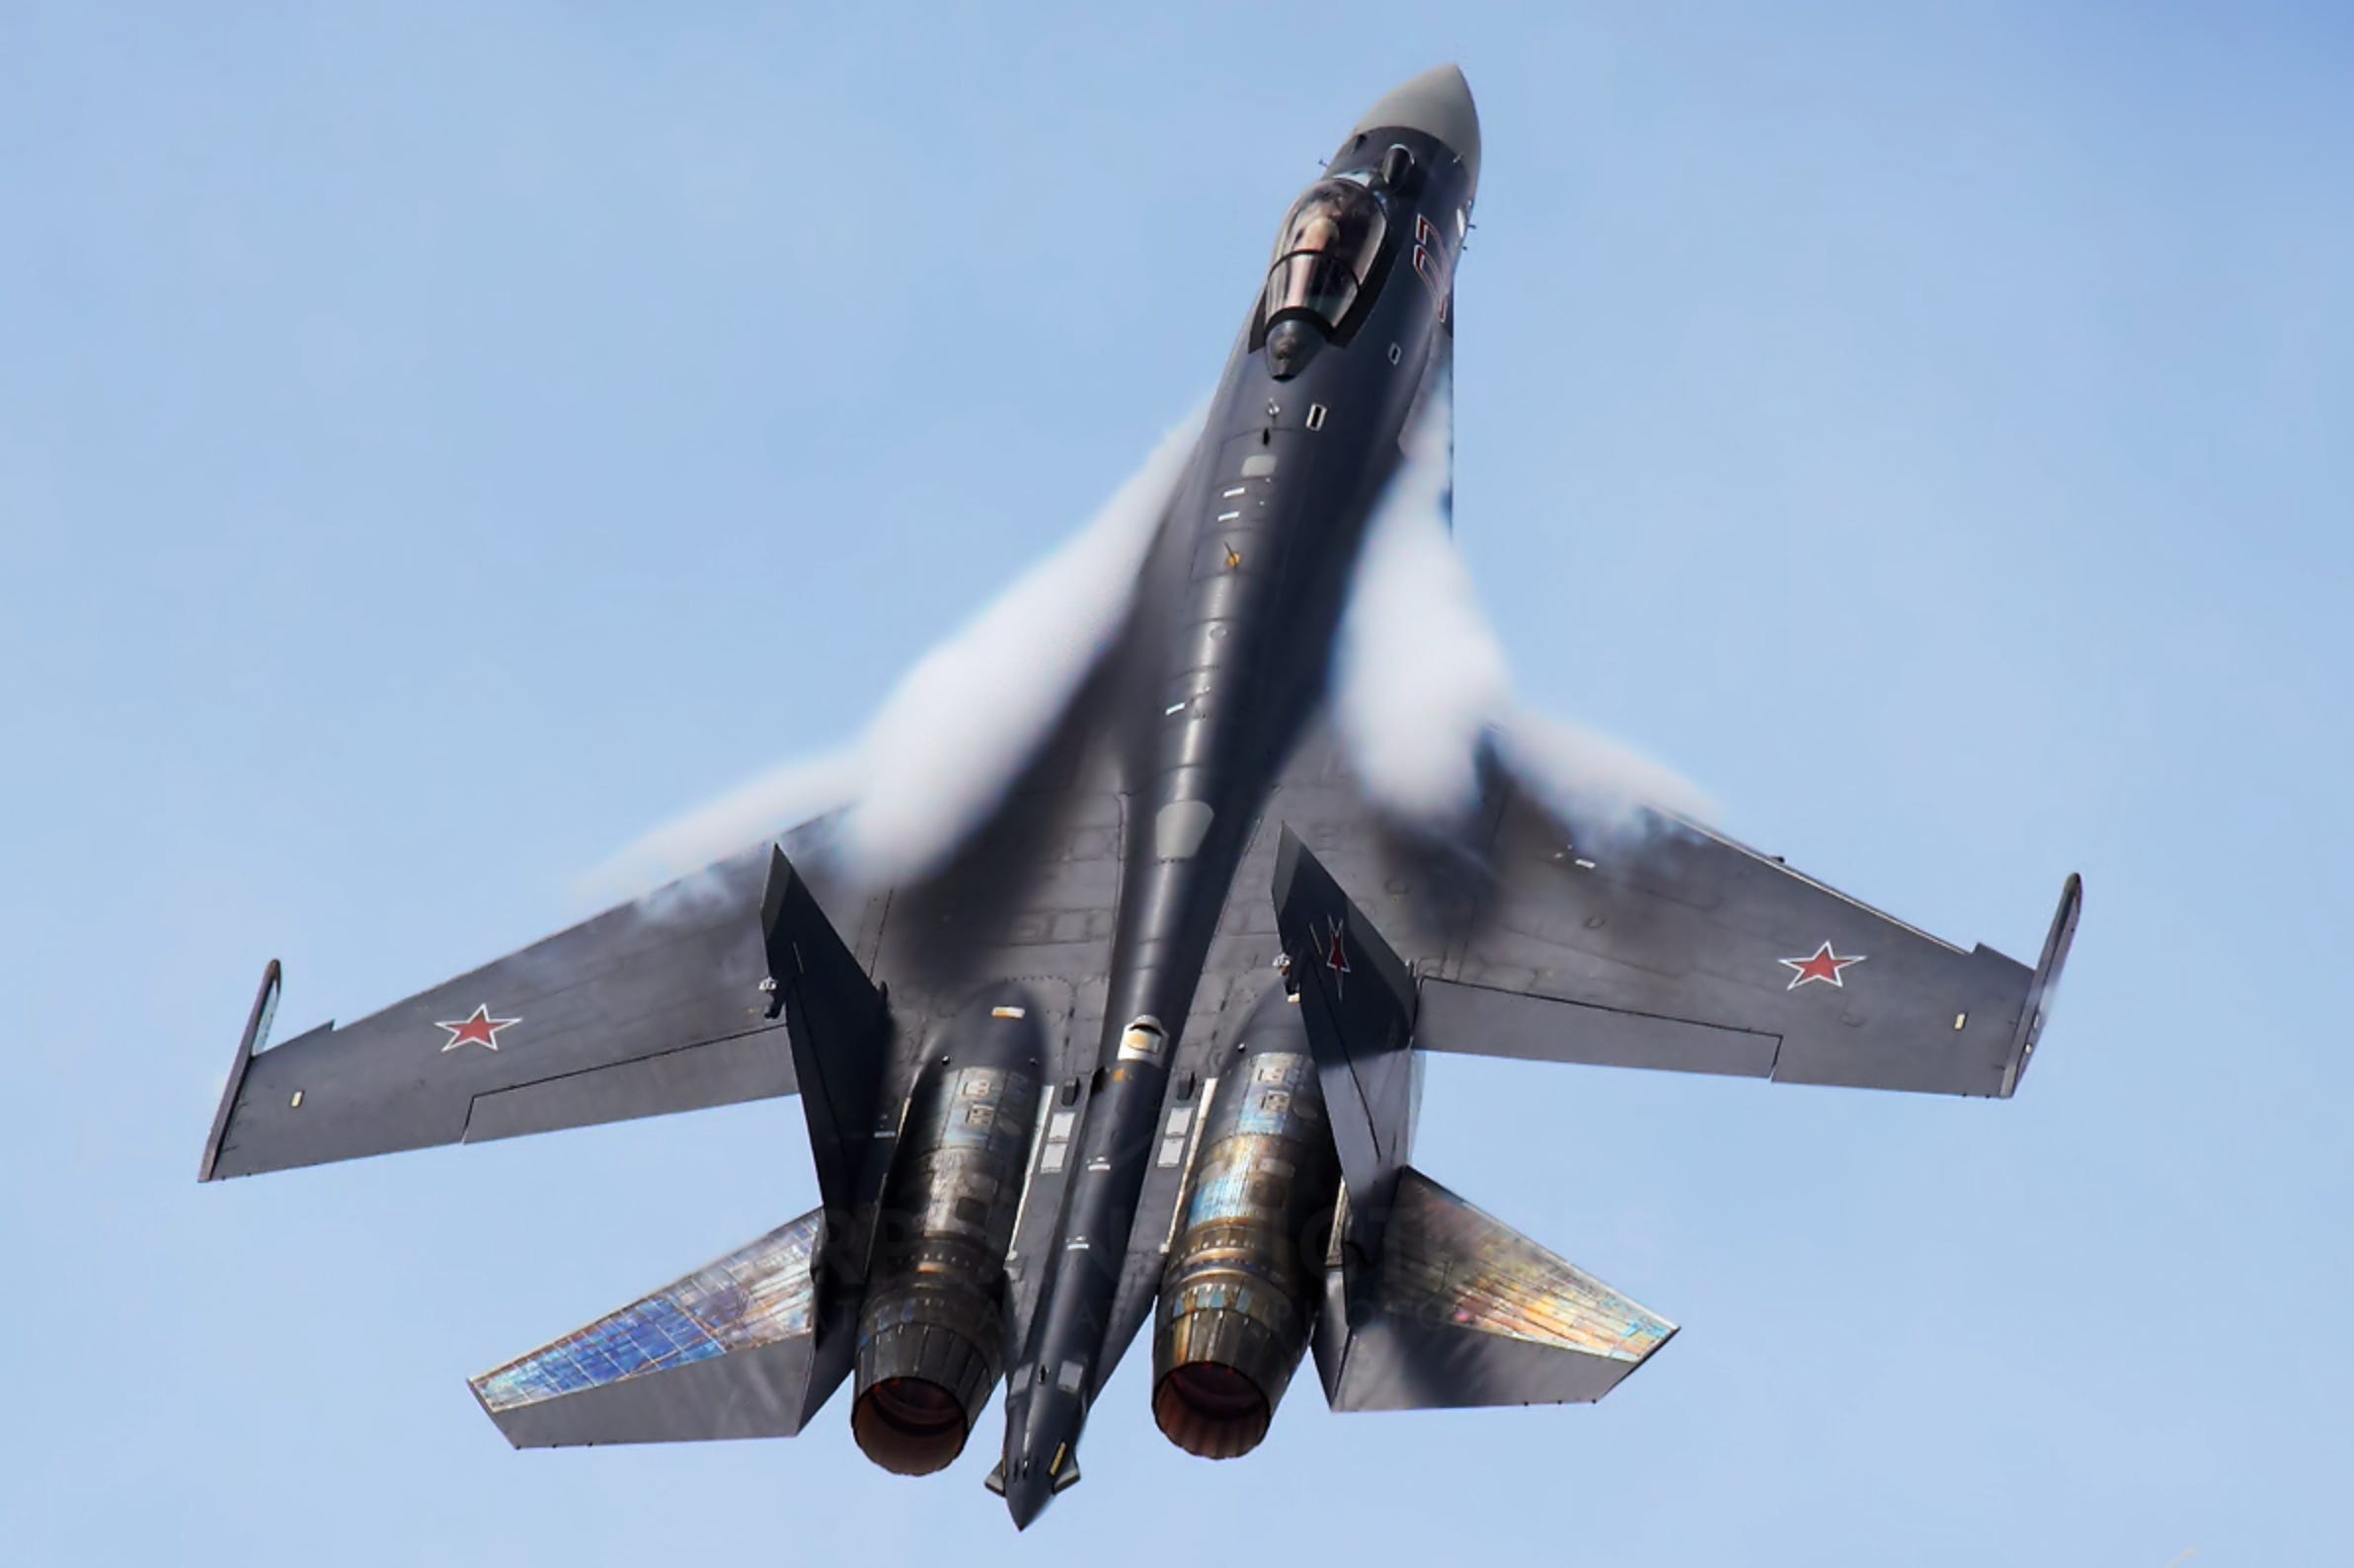
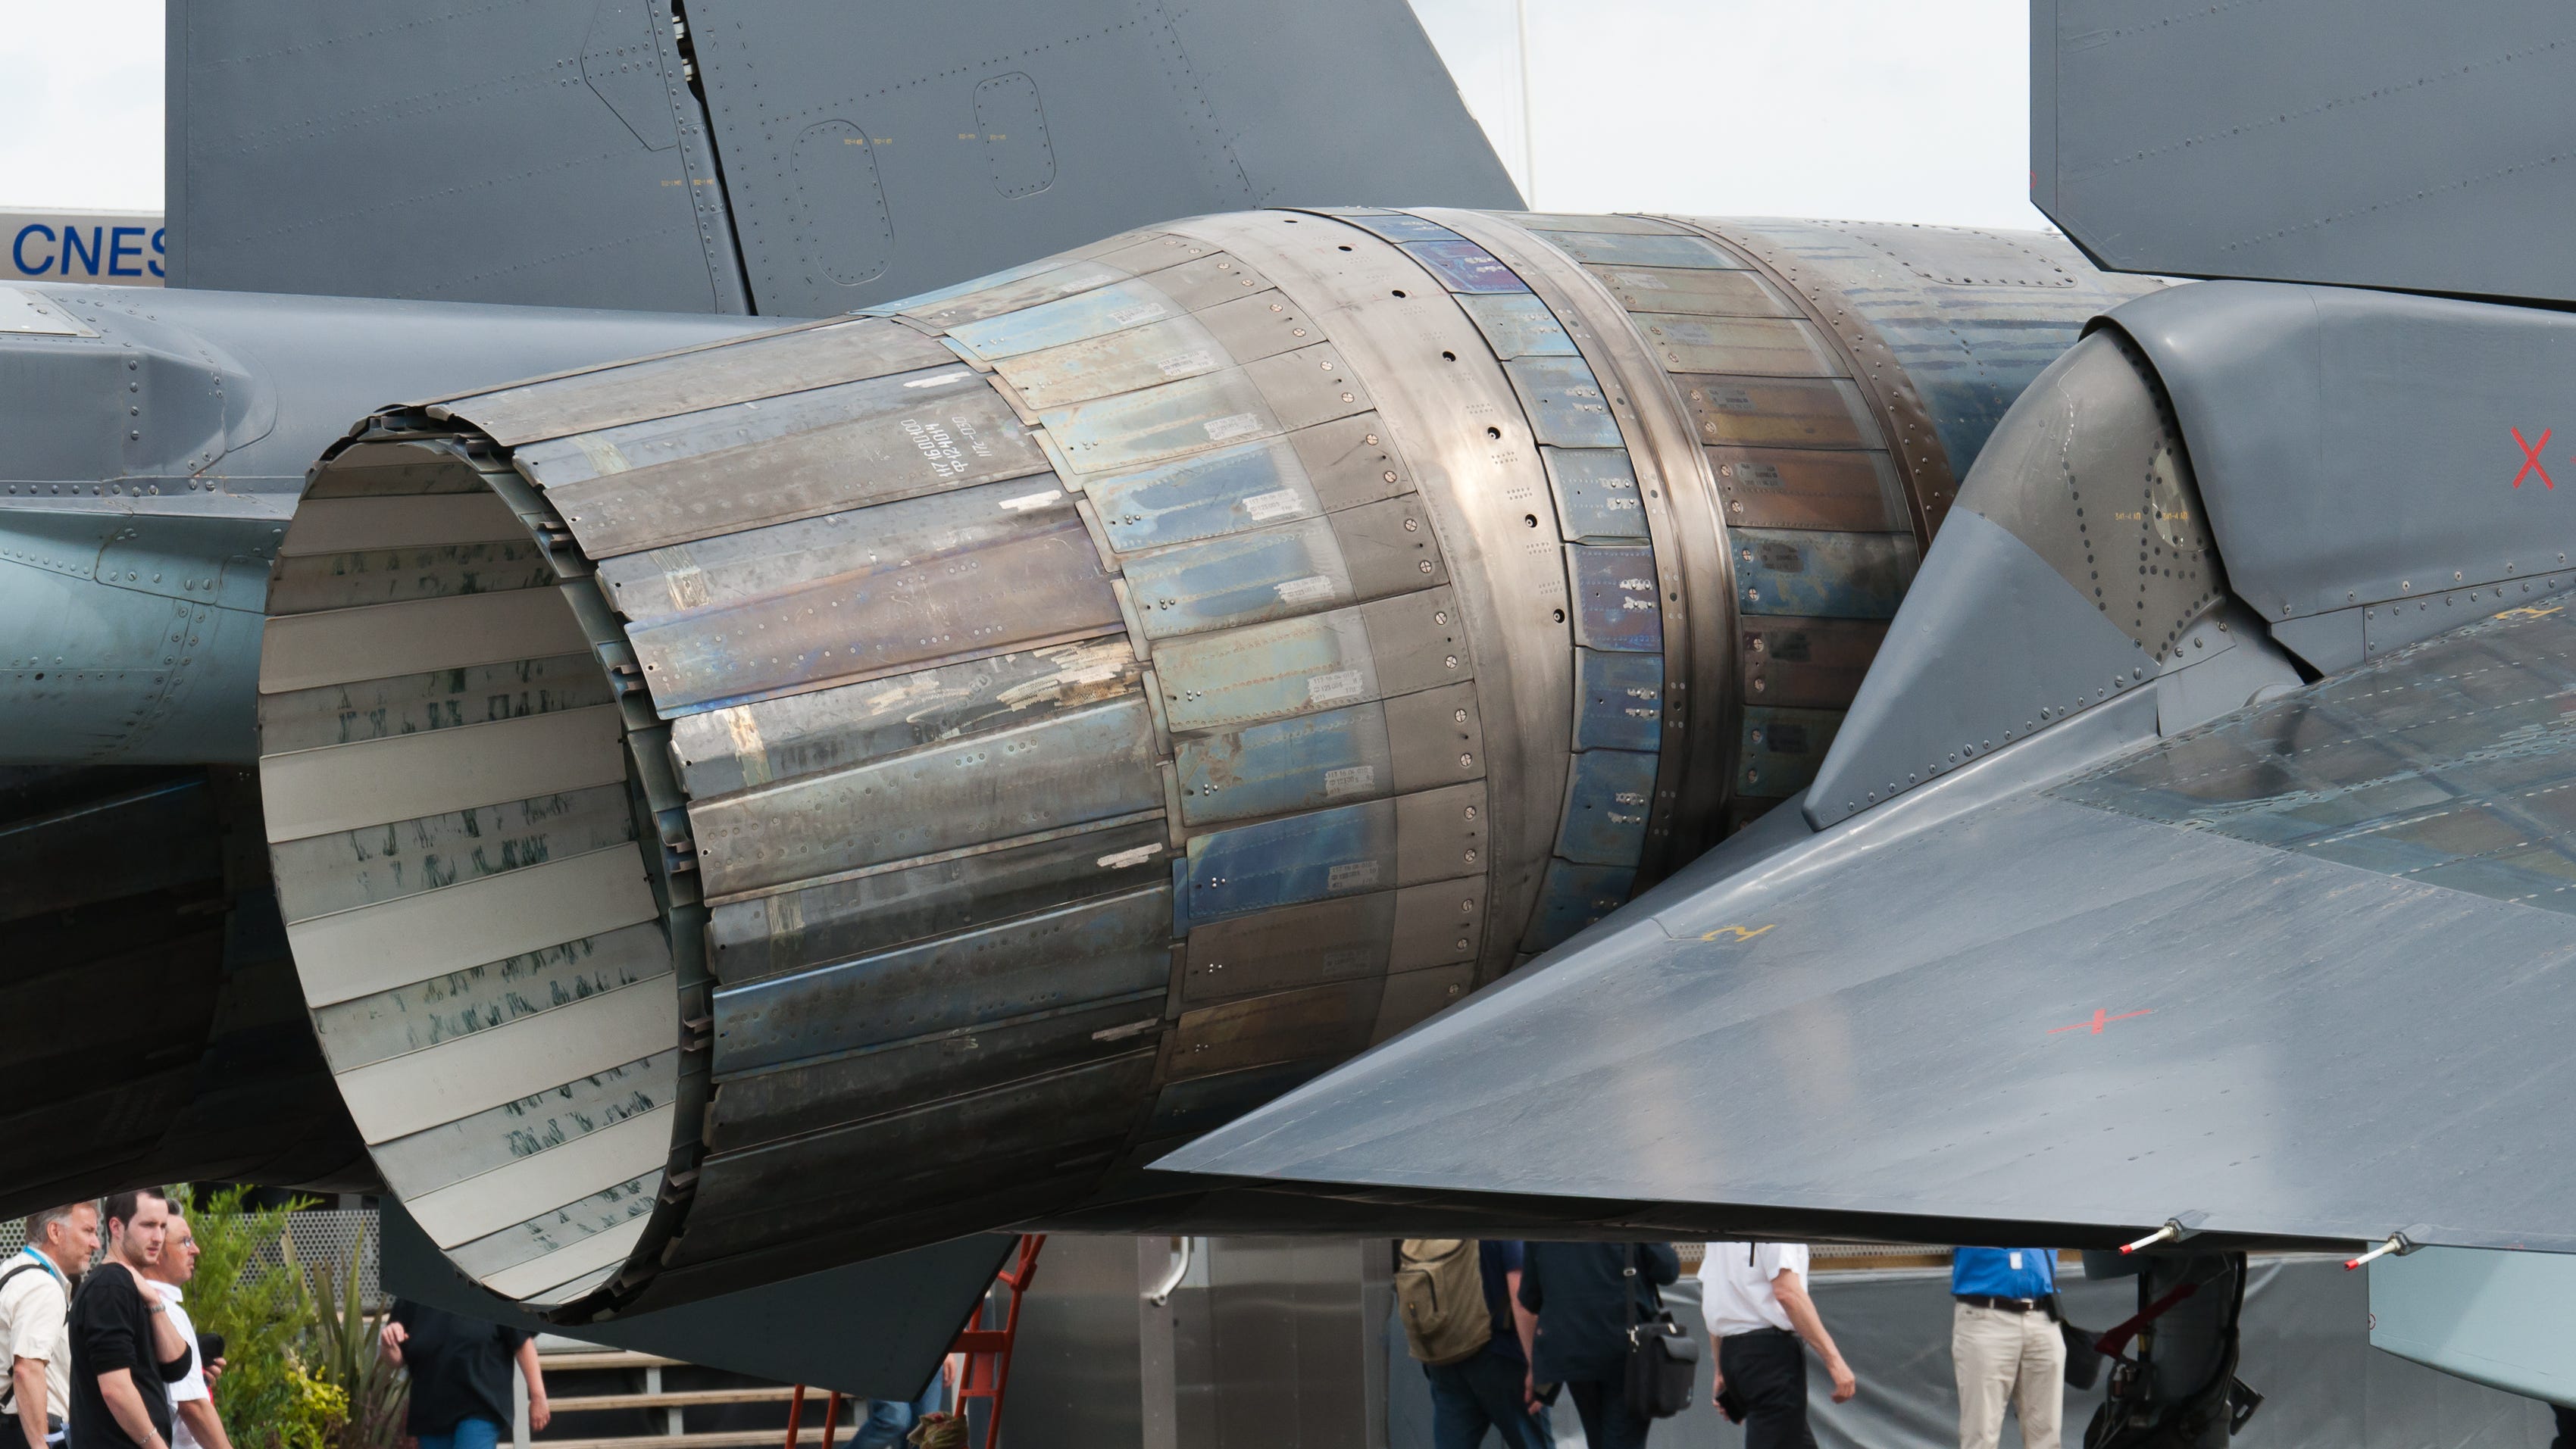
The Su-35 is the latest iteration of the venerable Su-27 “Flanker” family. Featuring upgraded PESA radar in the nose and along the wings, IR missile warning indicators, a reinforced airframe, upgraded thrust vectoring, and completely modern avionics the Su-35 is the pinnacle of Russian fourth generation aircraft design. One of the most significant visual components of the Su-35 are it’s engines which remain unpainted and exhibit unbelievable heat-staining and patterns on the engine tops and elevators.
Now for the casual modeler, recreating these intricate and layered effects could deter them from attempting this subject. Model kit instructions and painting guides usually recommend simply painting the whole area a gunmetal color without any indication on how the heat staining could be achieved, leaving the modeler lost. But for a “flanker fanatic” like myself this is one of the prominent draws for this aircraft. Having recently completed my second Su-35 kit and two Su-27UBs prior to that, I have refined a technique that works extremely well for me and I’d like to share it to help make this subject more approachable.
The Build
Having mentioned above, this is my second Su-35 kit having previously built the Great Wall Hobby kit in 1/48 scale. This was of August of 2020 and depicted the first prototype ‘901 Black’.
The subject of this article will be the 1/72 version of the kit by the same manufacturer. Much like it’s big brother the 1/72 Su-35 from GWH is impeccably engineered but in a smaller package with very little detail lost in translation.
Let’s begin right after preliminary painting, the kit is primed with Mr. surfacer 1500 black and the painted with Mr paint colors for the Su-35. I’ve left the engine areas unpainted in order to help reduce the overall layers of paint.
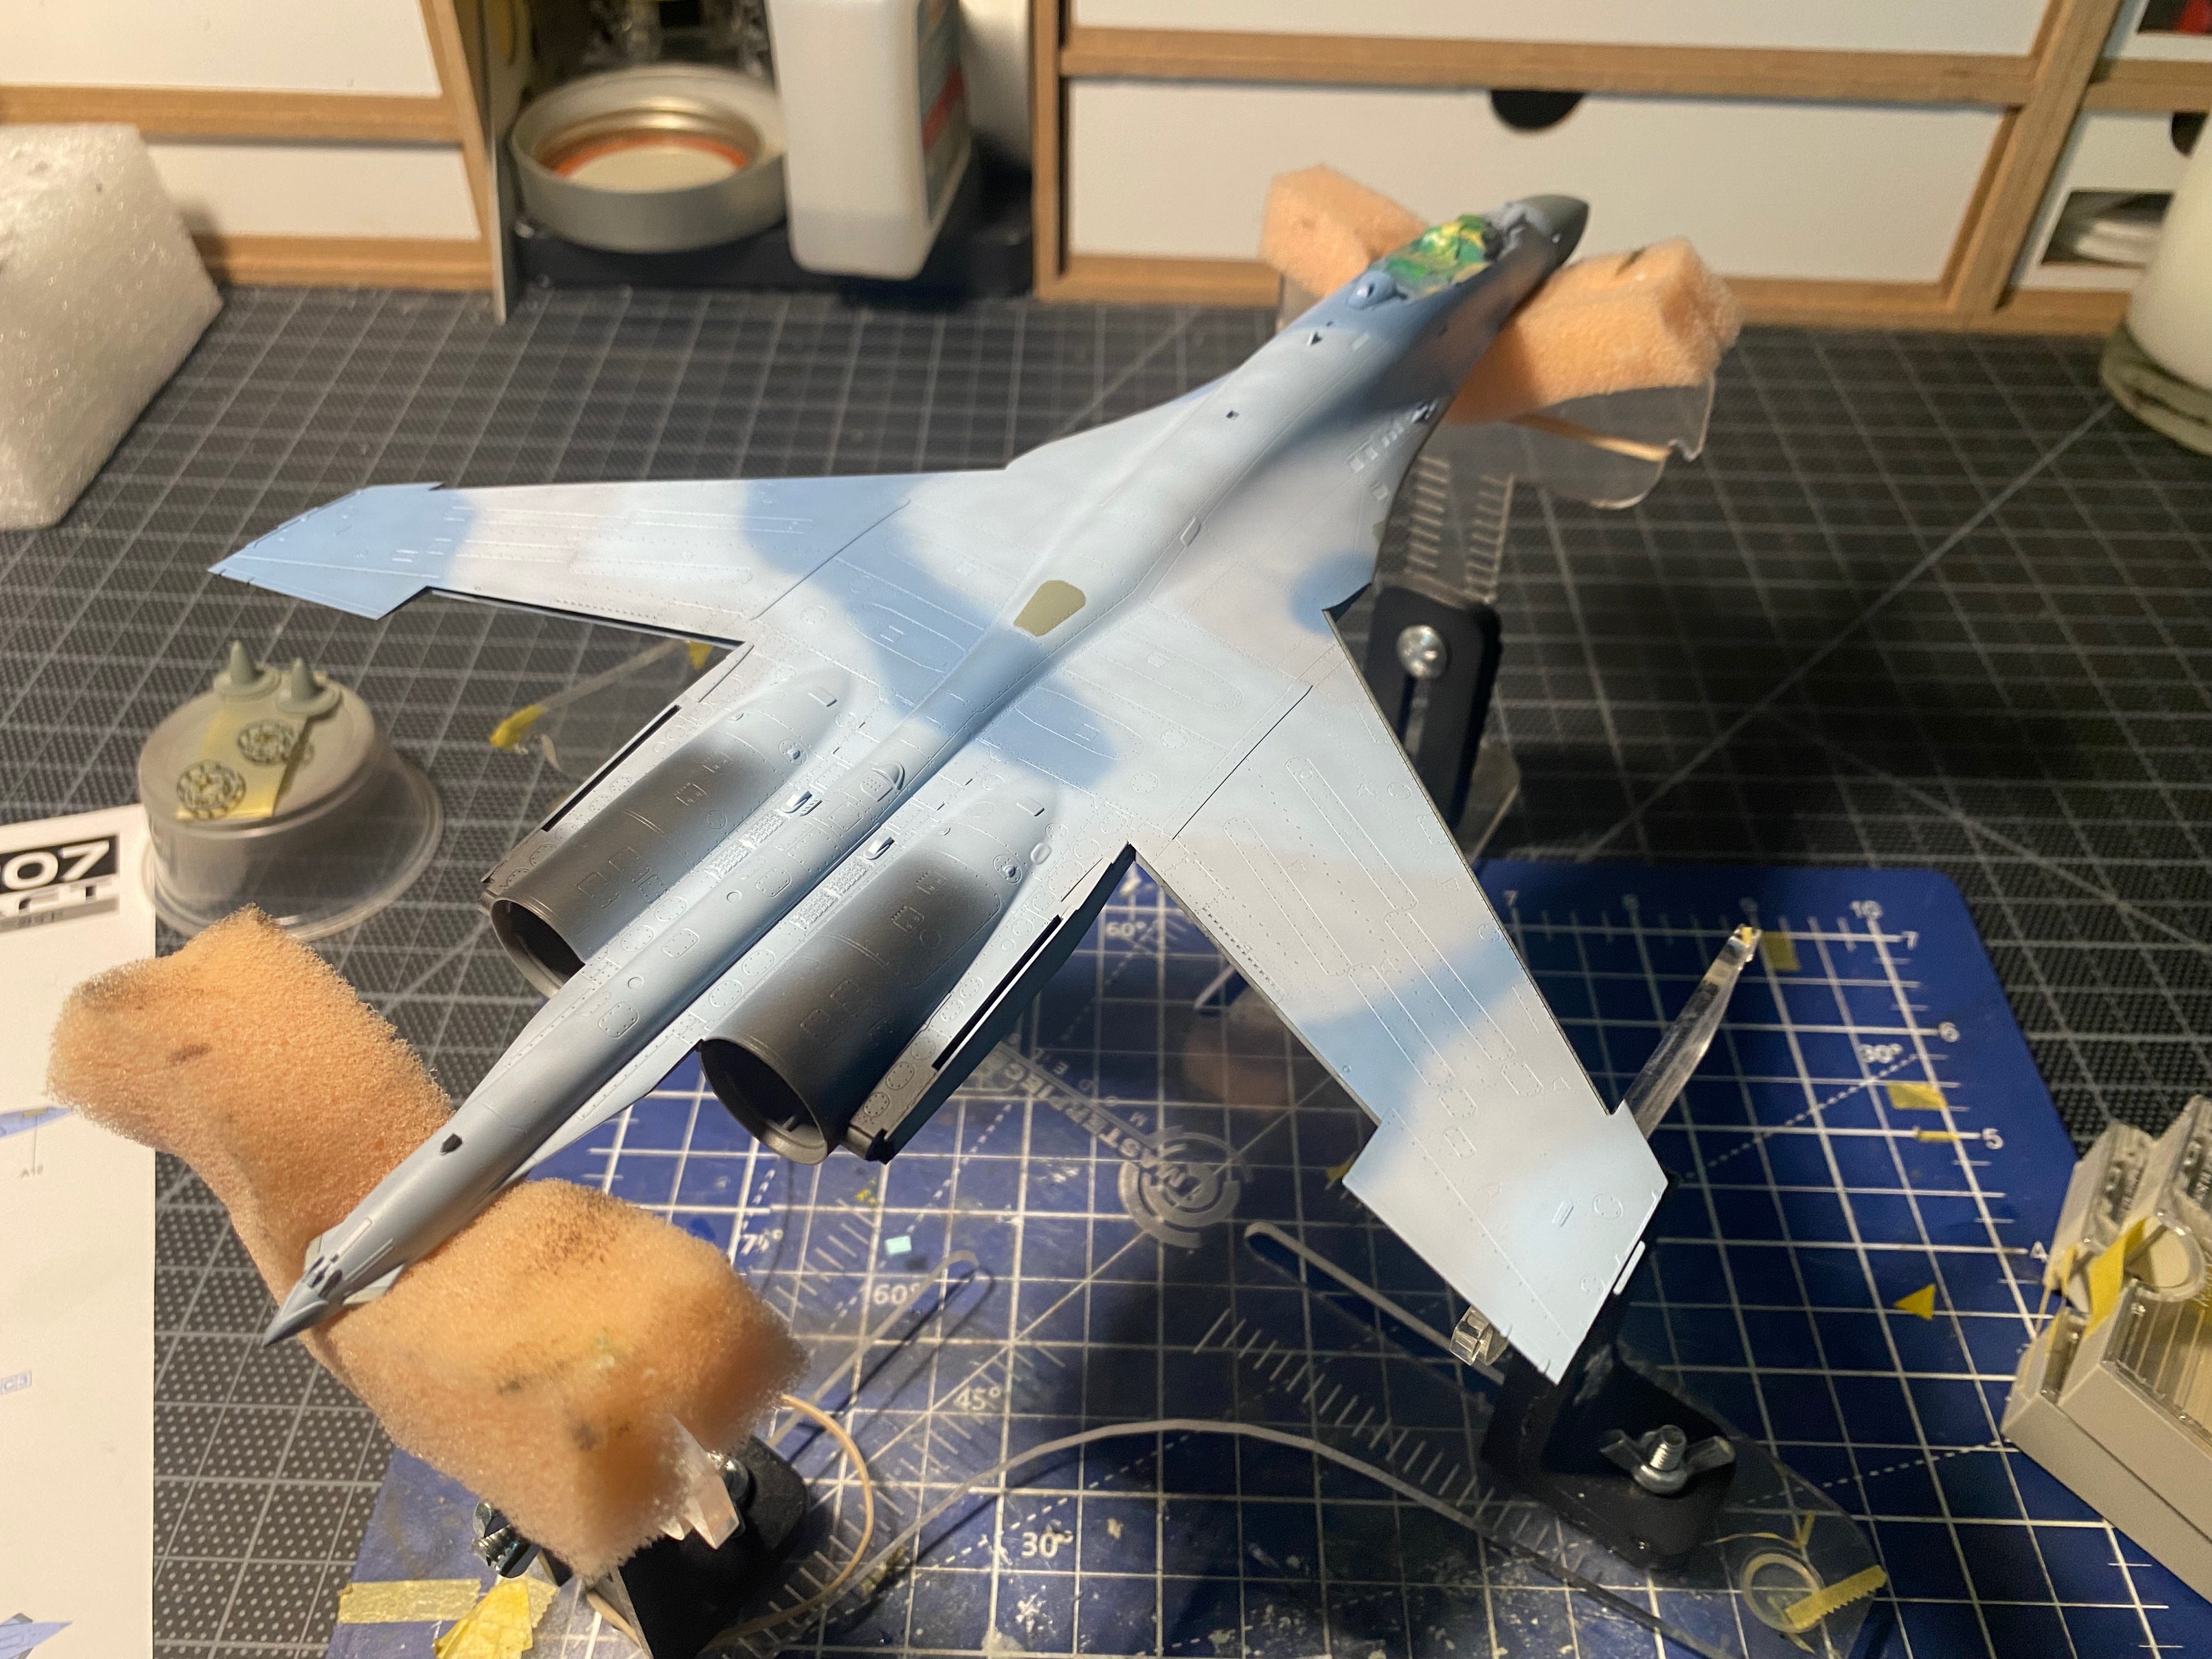
The first layer of paint is Mr. color C8 Silver. This is done to give a good metallic base swell as painting the area around the canon and other auxiliary panels.

C8 was also used to prime the engine nozzles and the leading edges of the elevators. Small squares were cut from Tamiya masking tape in order to emulate some the internal supports of the nozzle.
Top and bottom panels were next masked and sprayed with a mix of one part C8 to one part C28.

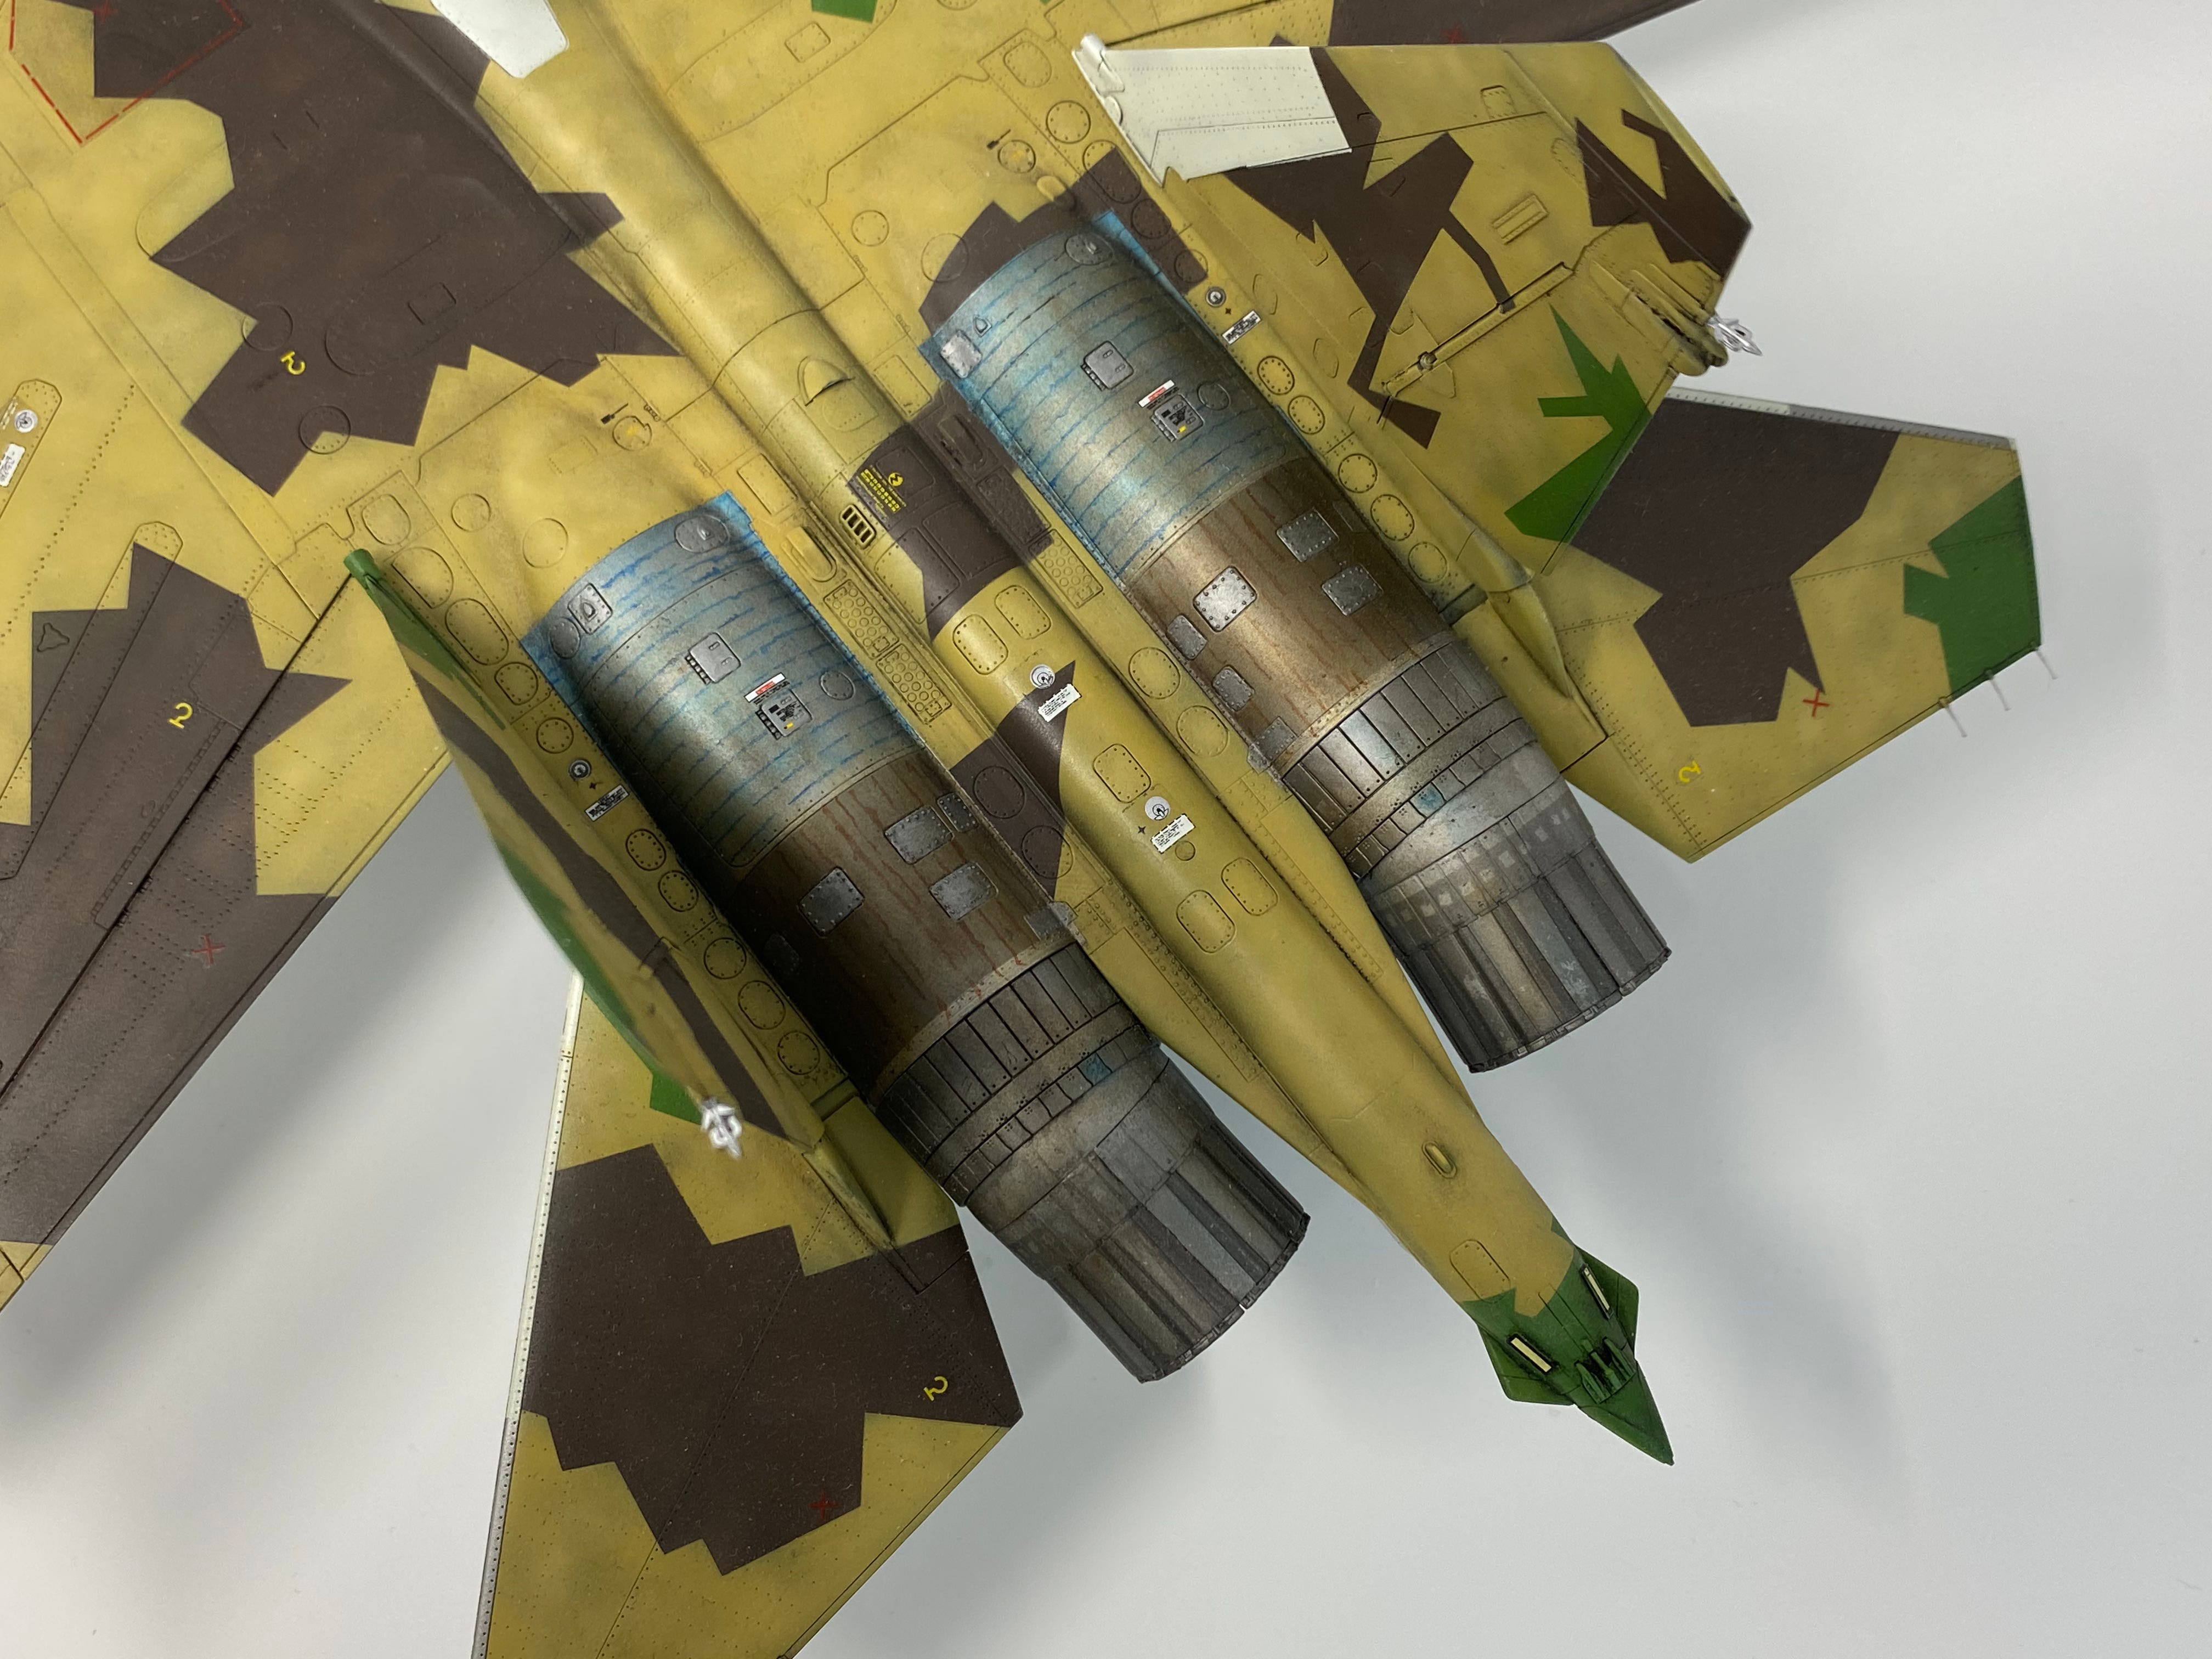
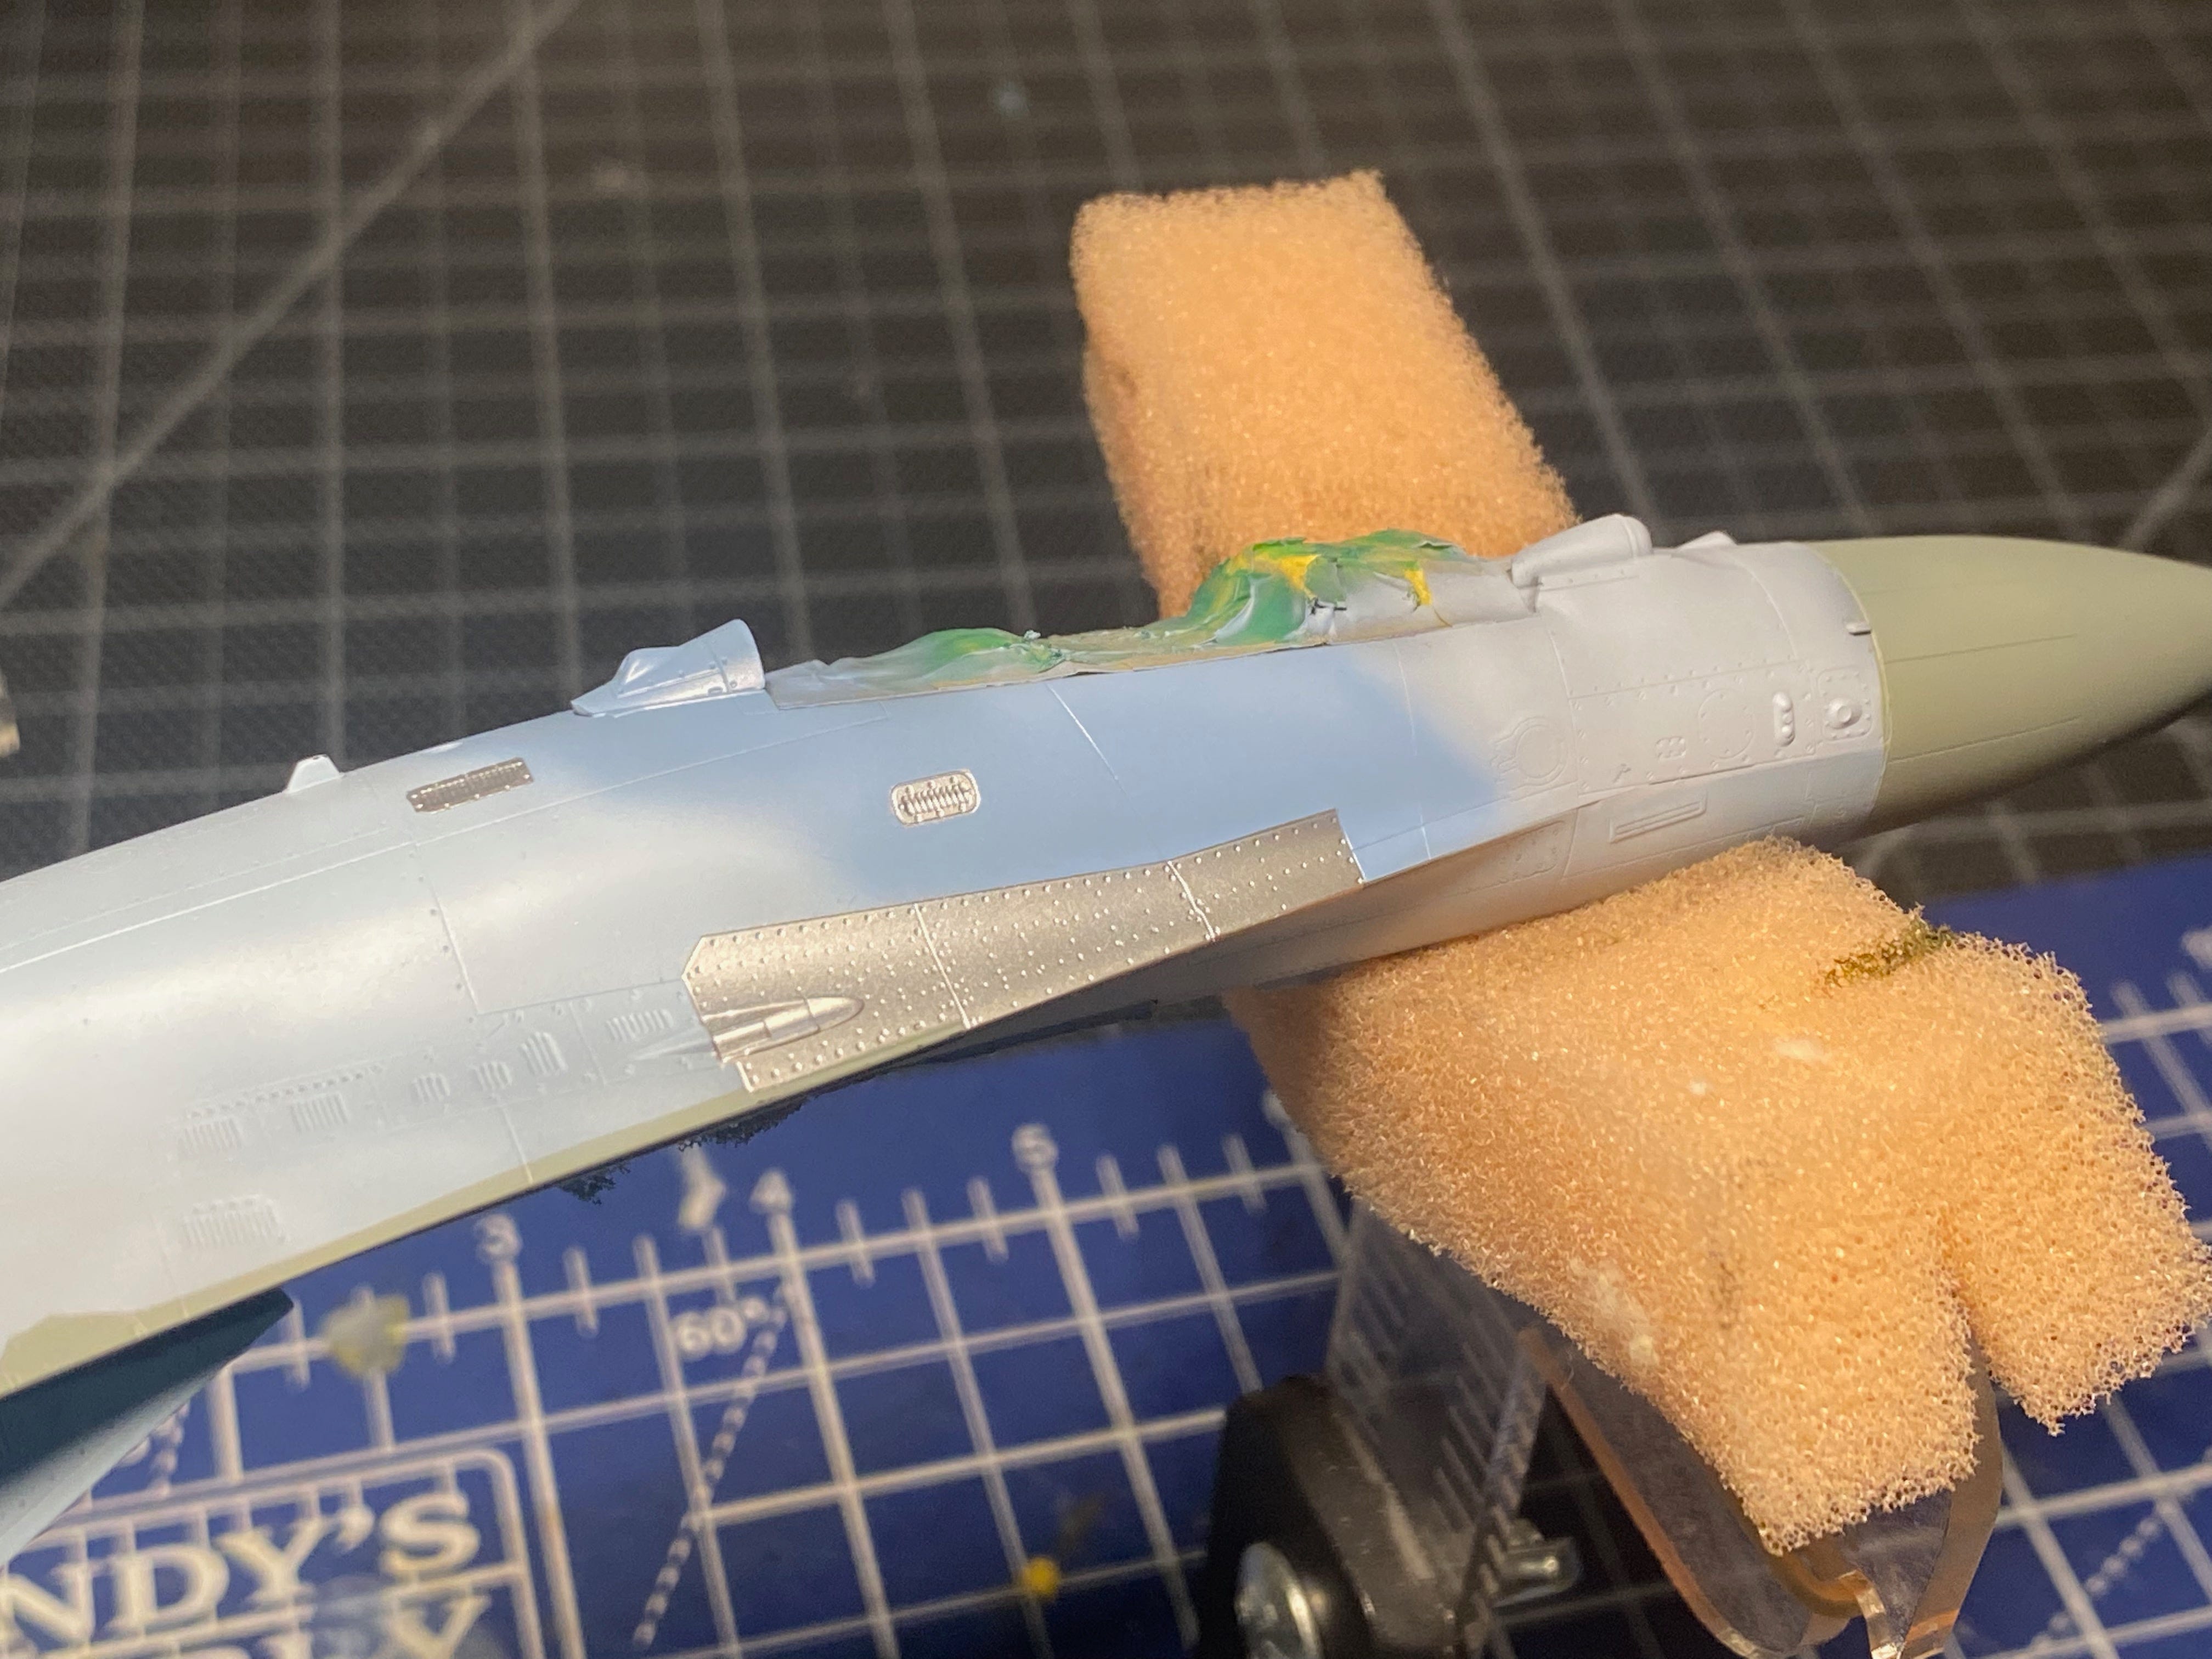
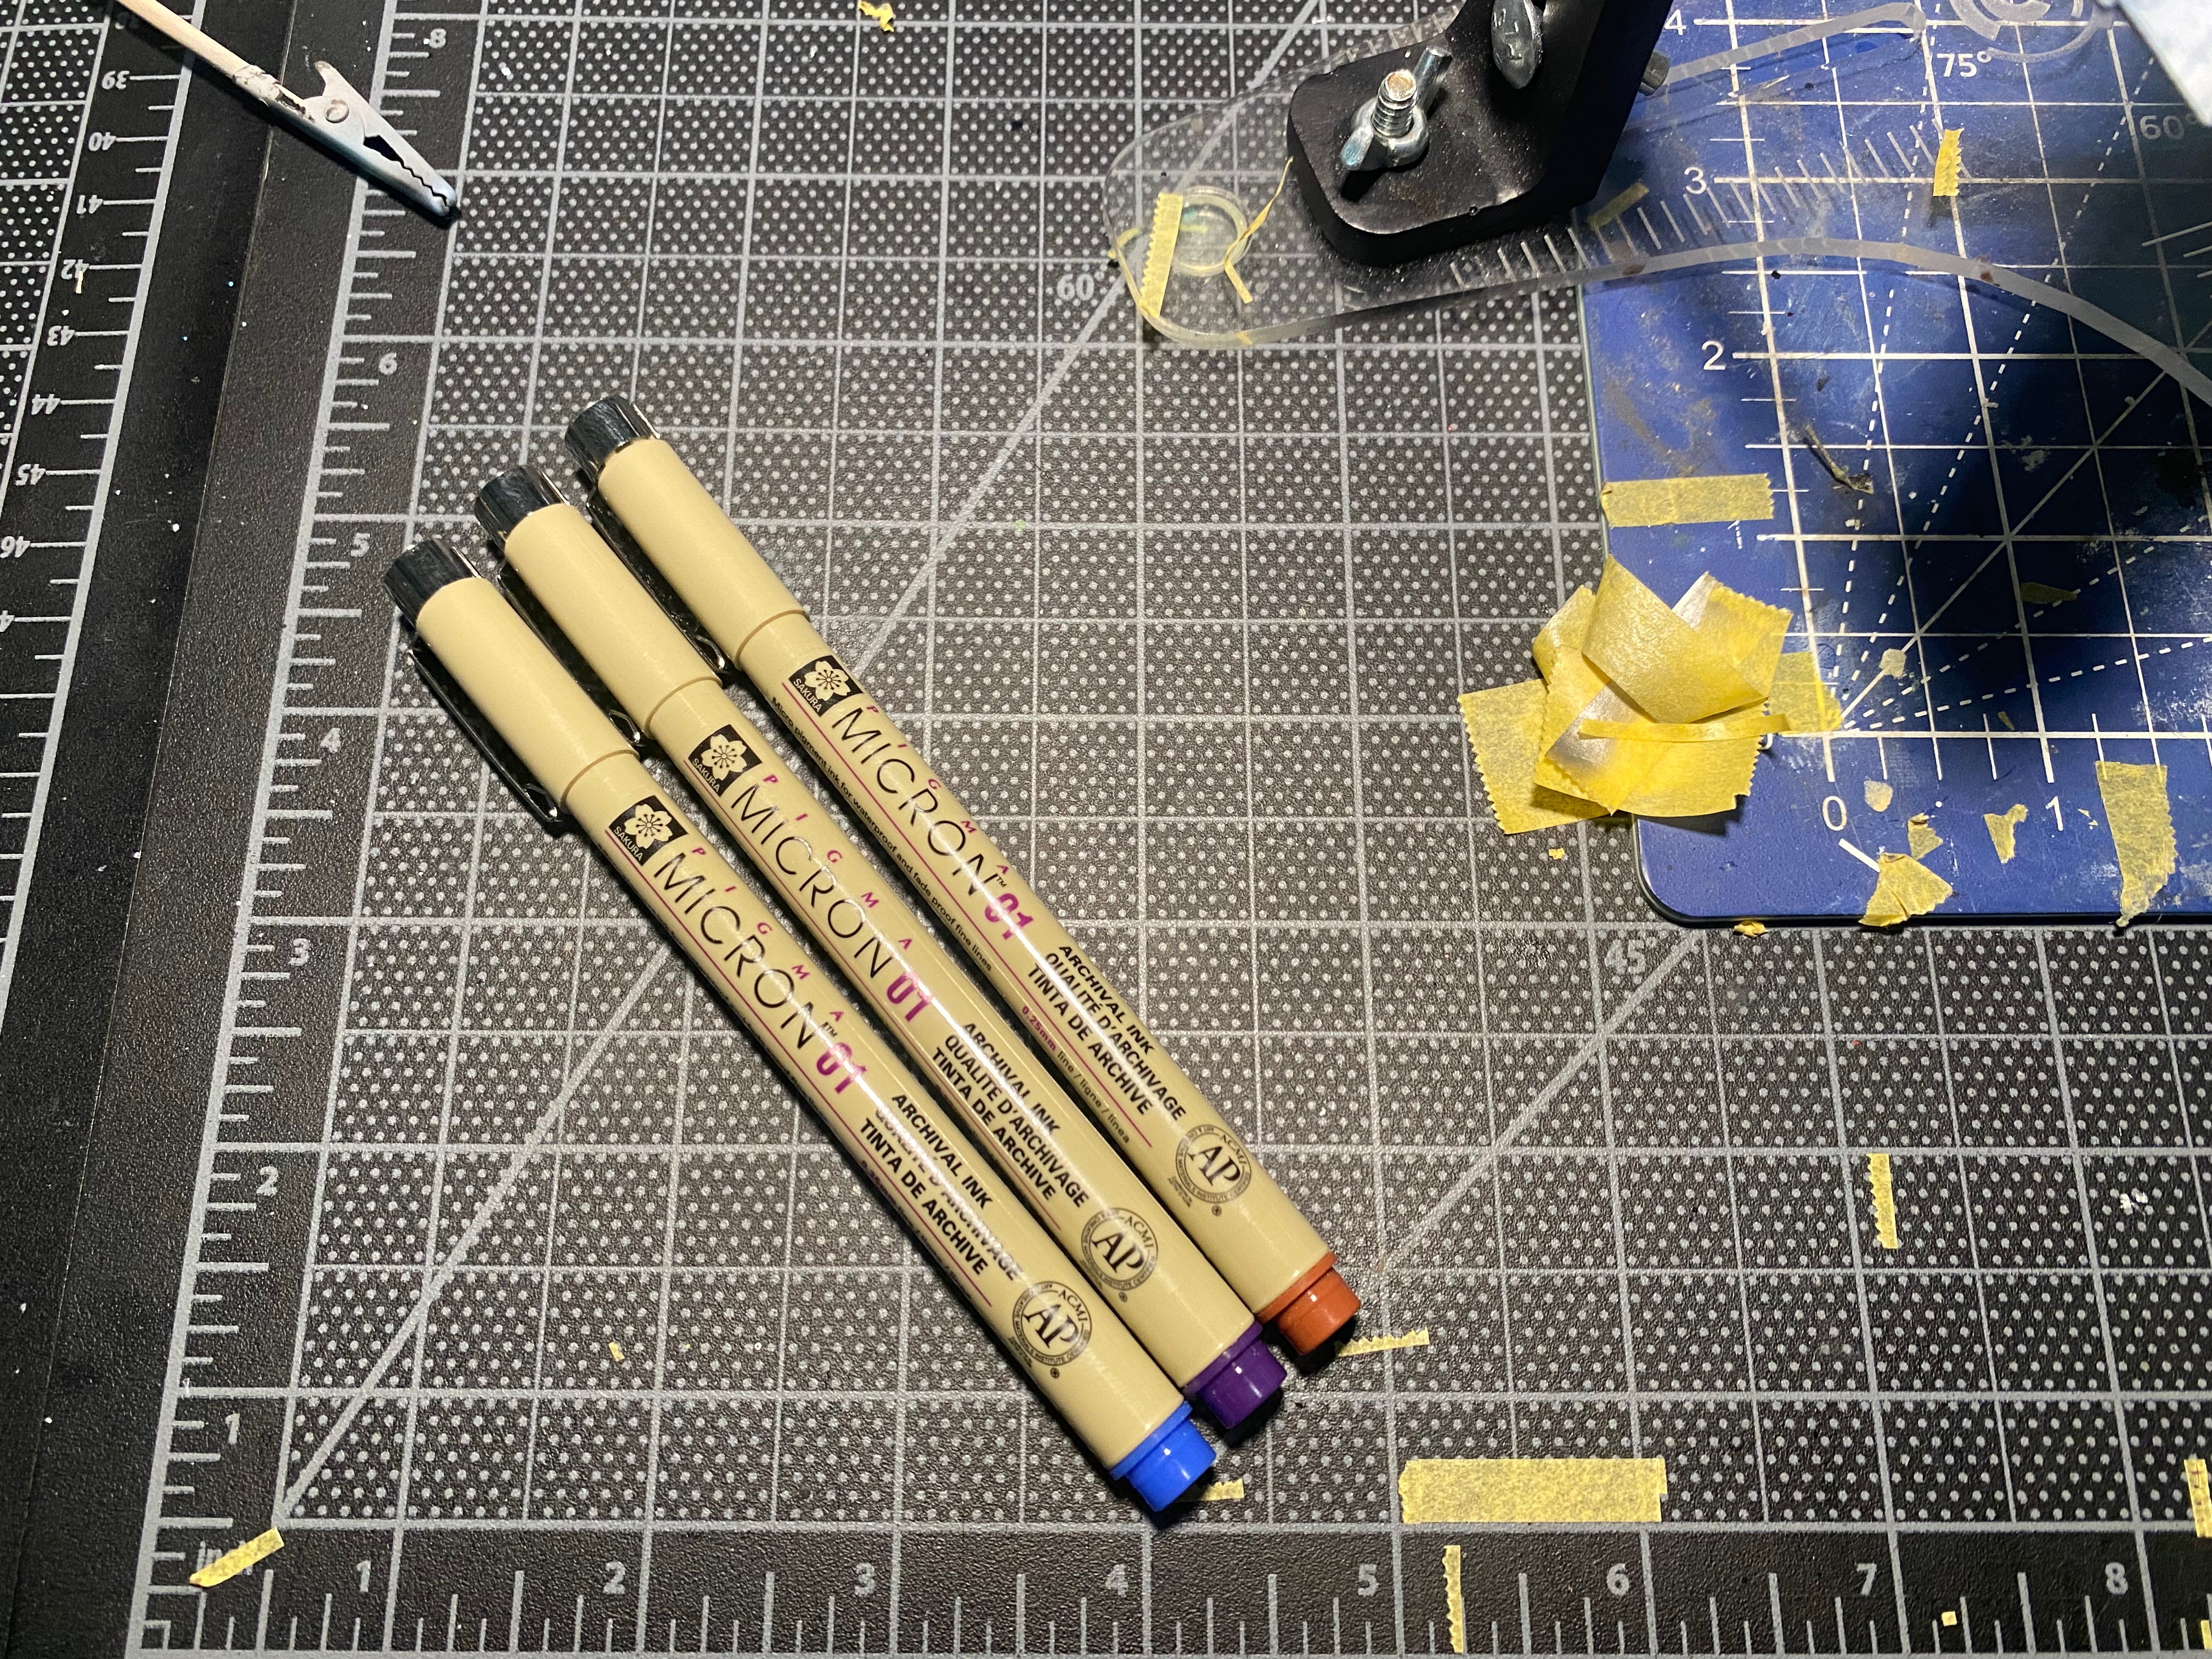
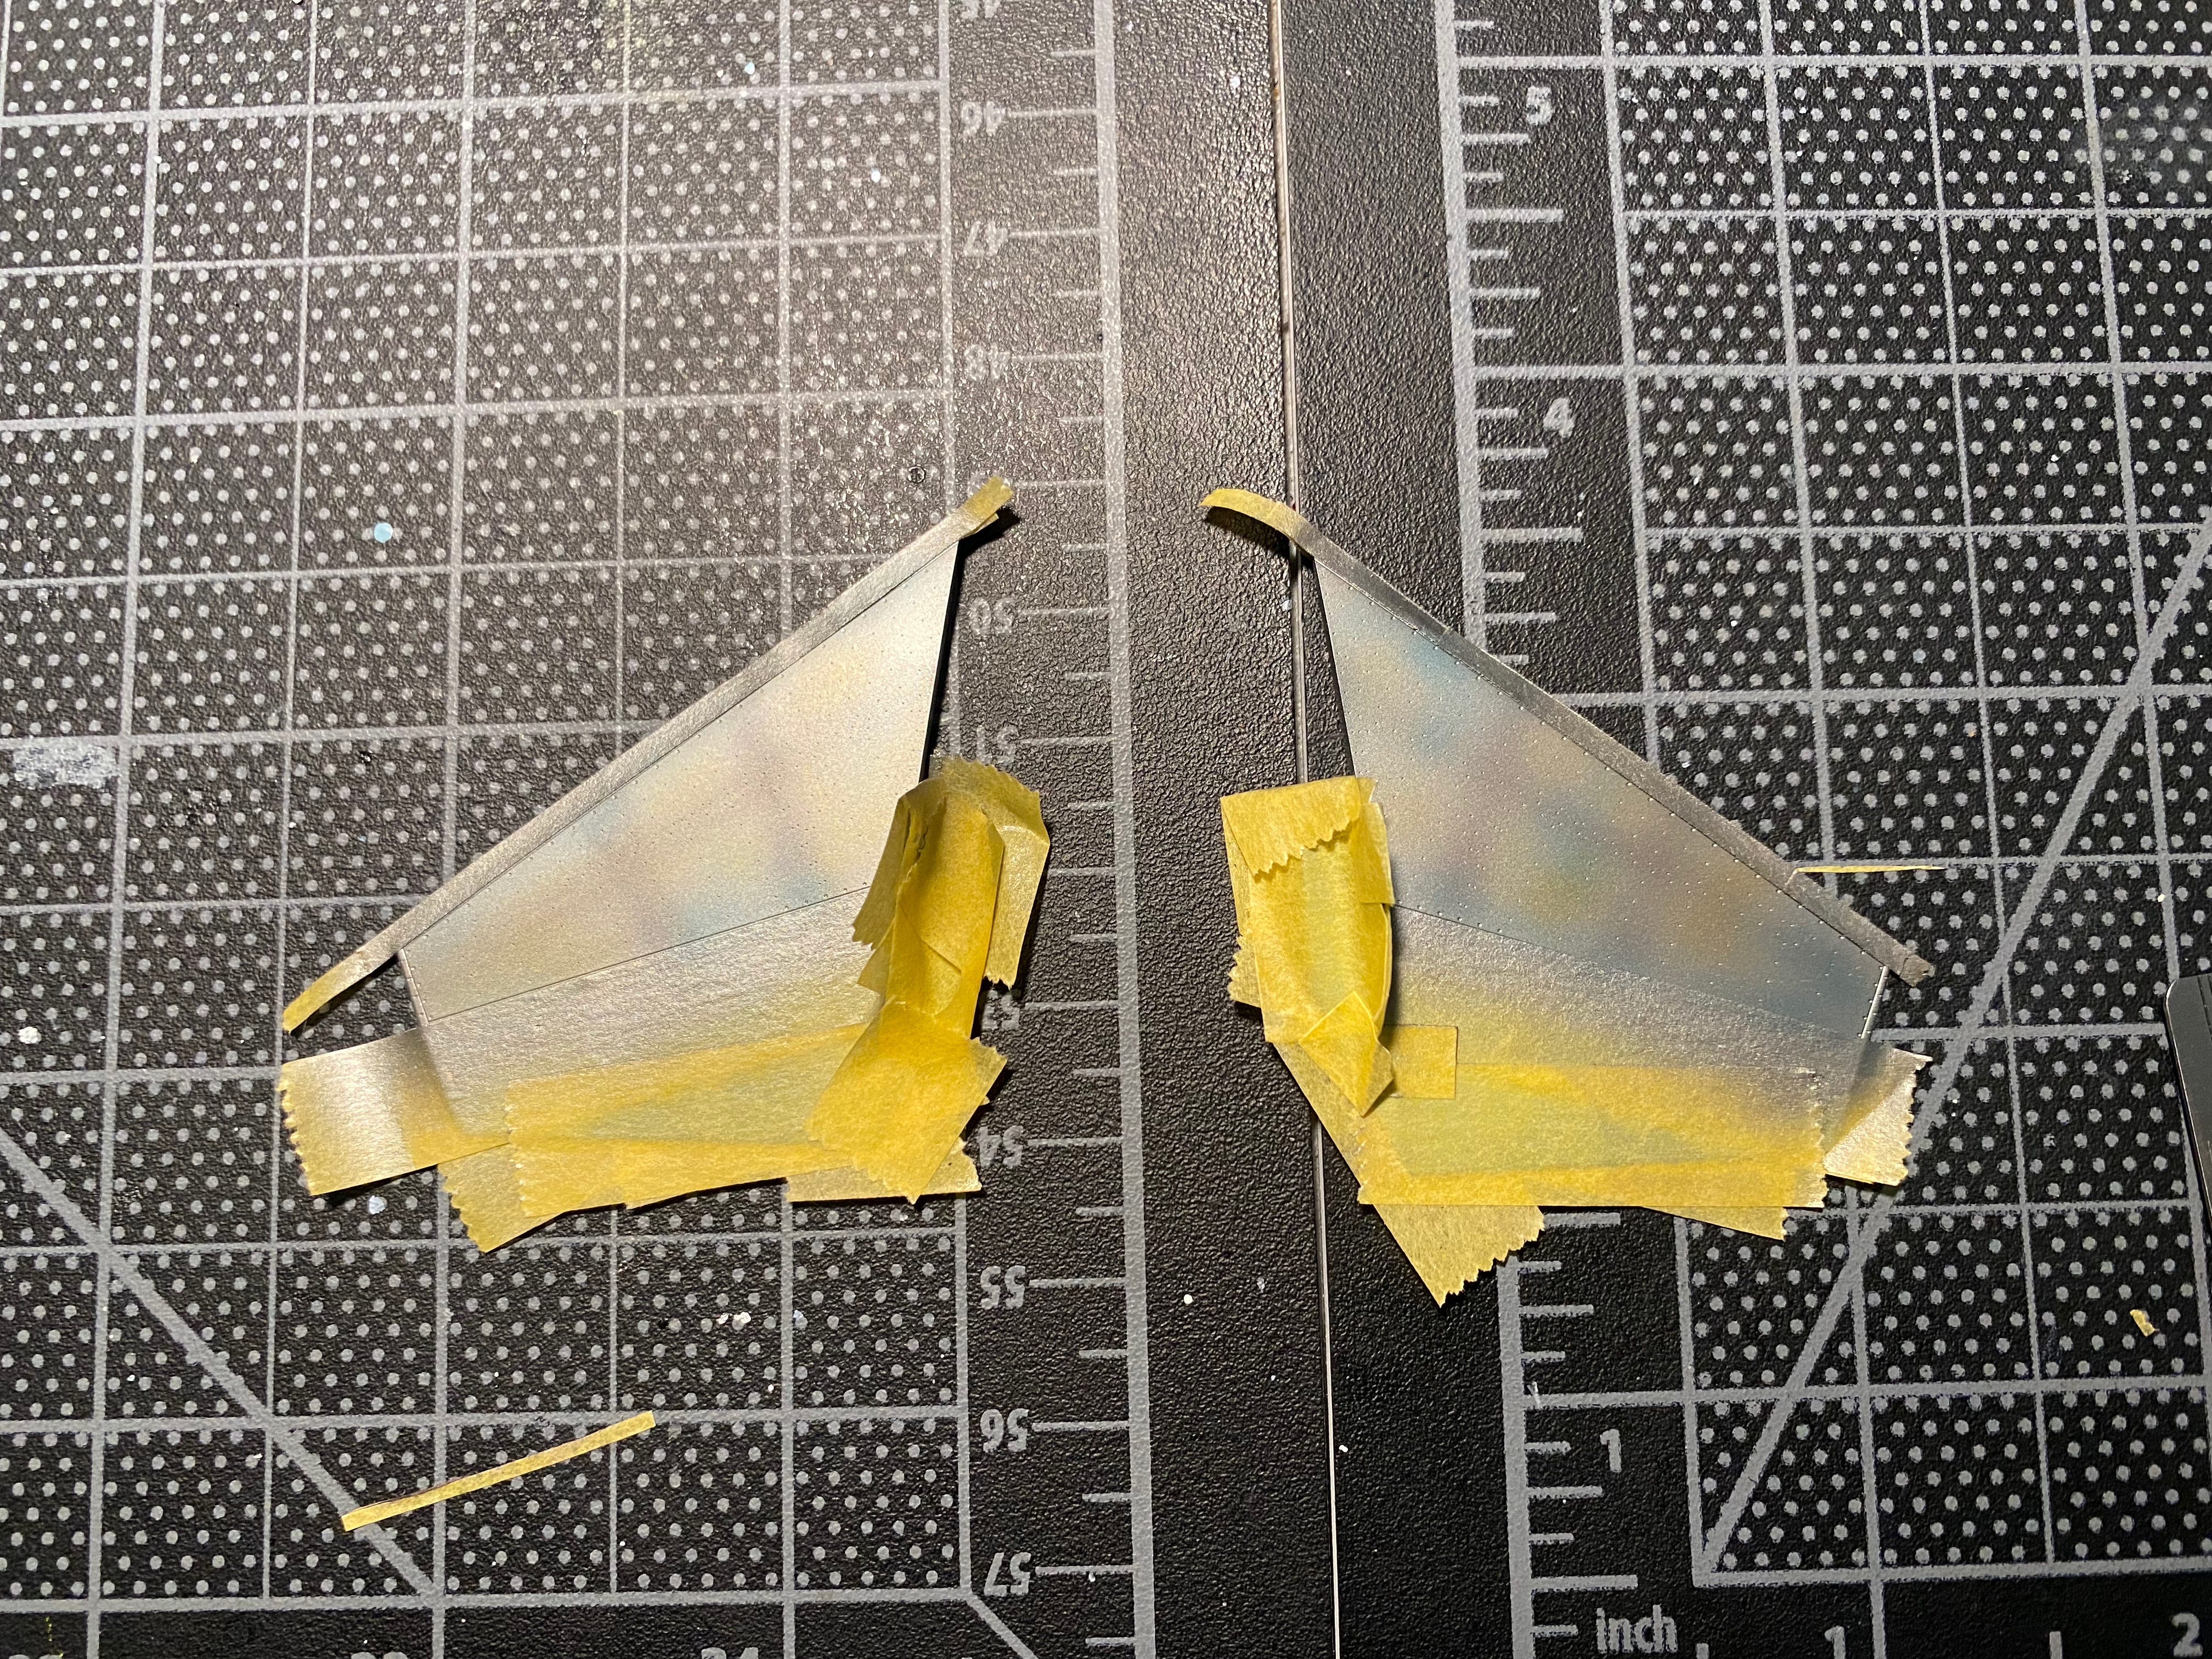
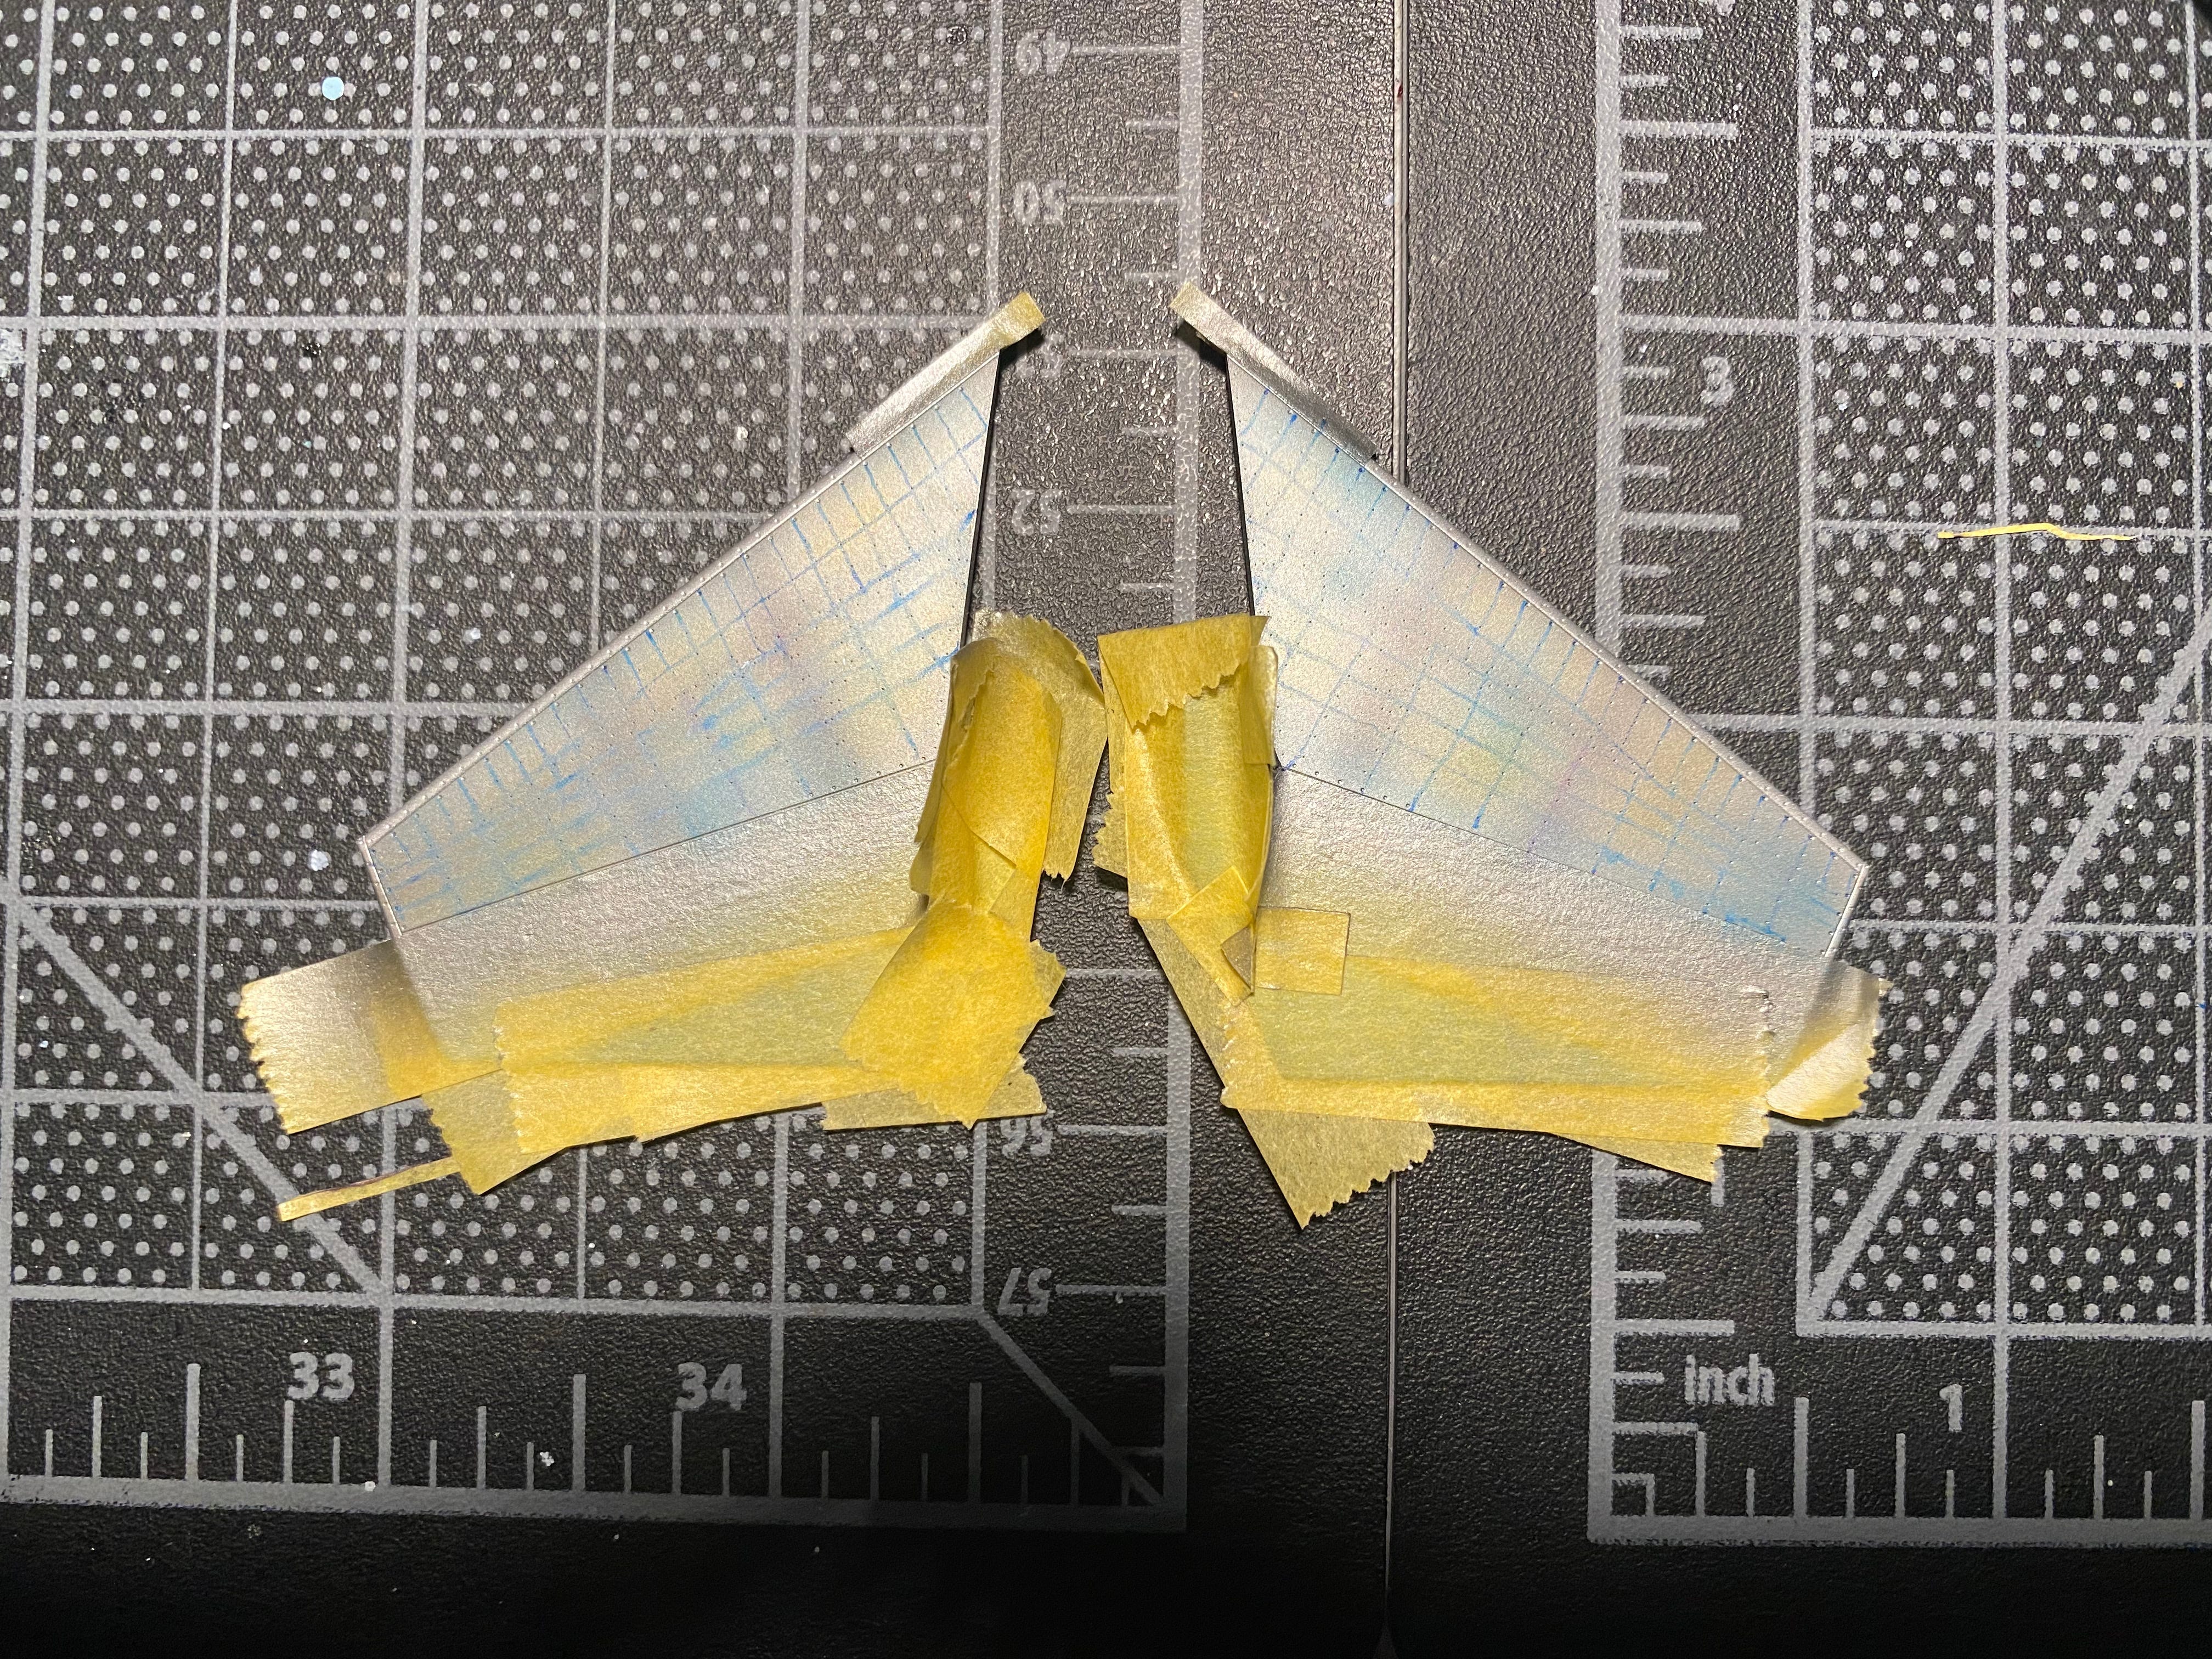
With our base metallics painted we are ready to emulate the discoloration due to the internal bracing of the engines. I do this using Micron 01 pens in brown, purple, and blue. These are great pens for sketching and general precision use and their very fine tips really allow great precision and a scale accurate look for this purpose.
I cut Tamiya tape into approximately 0.5mm strips and lay them onto the engine to give me guides for nice straight lines.
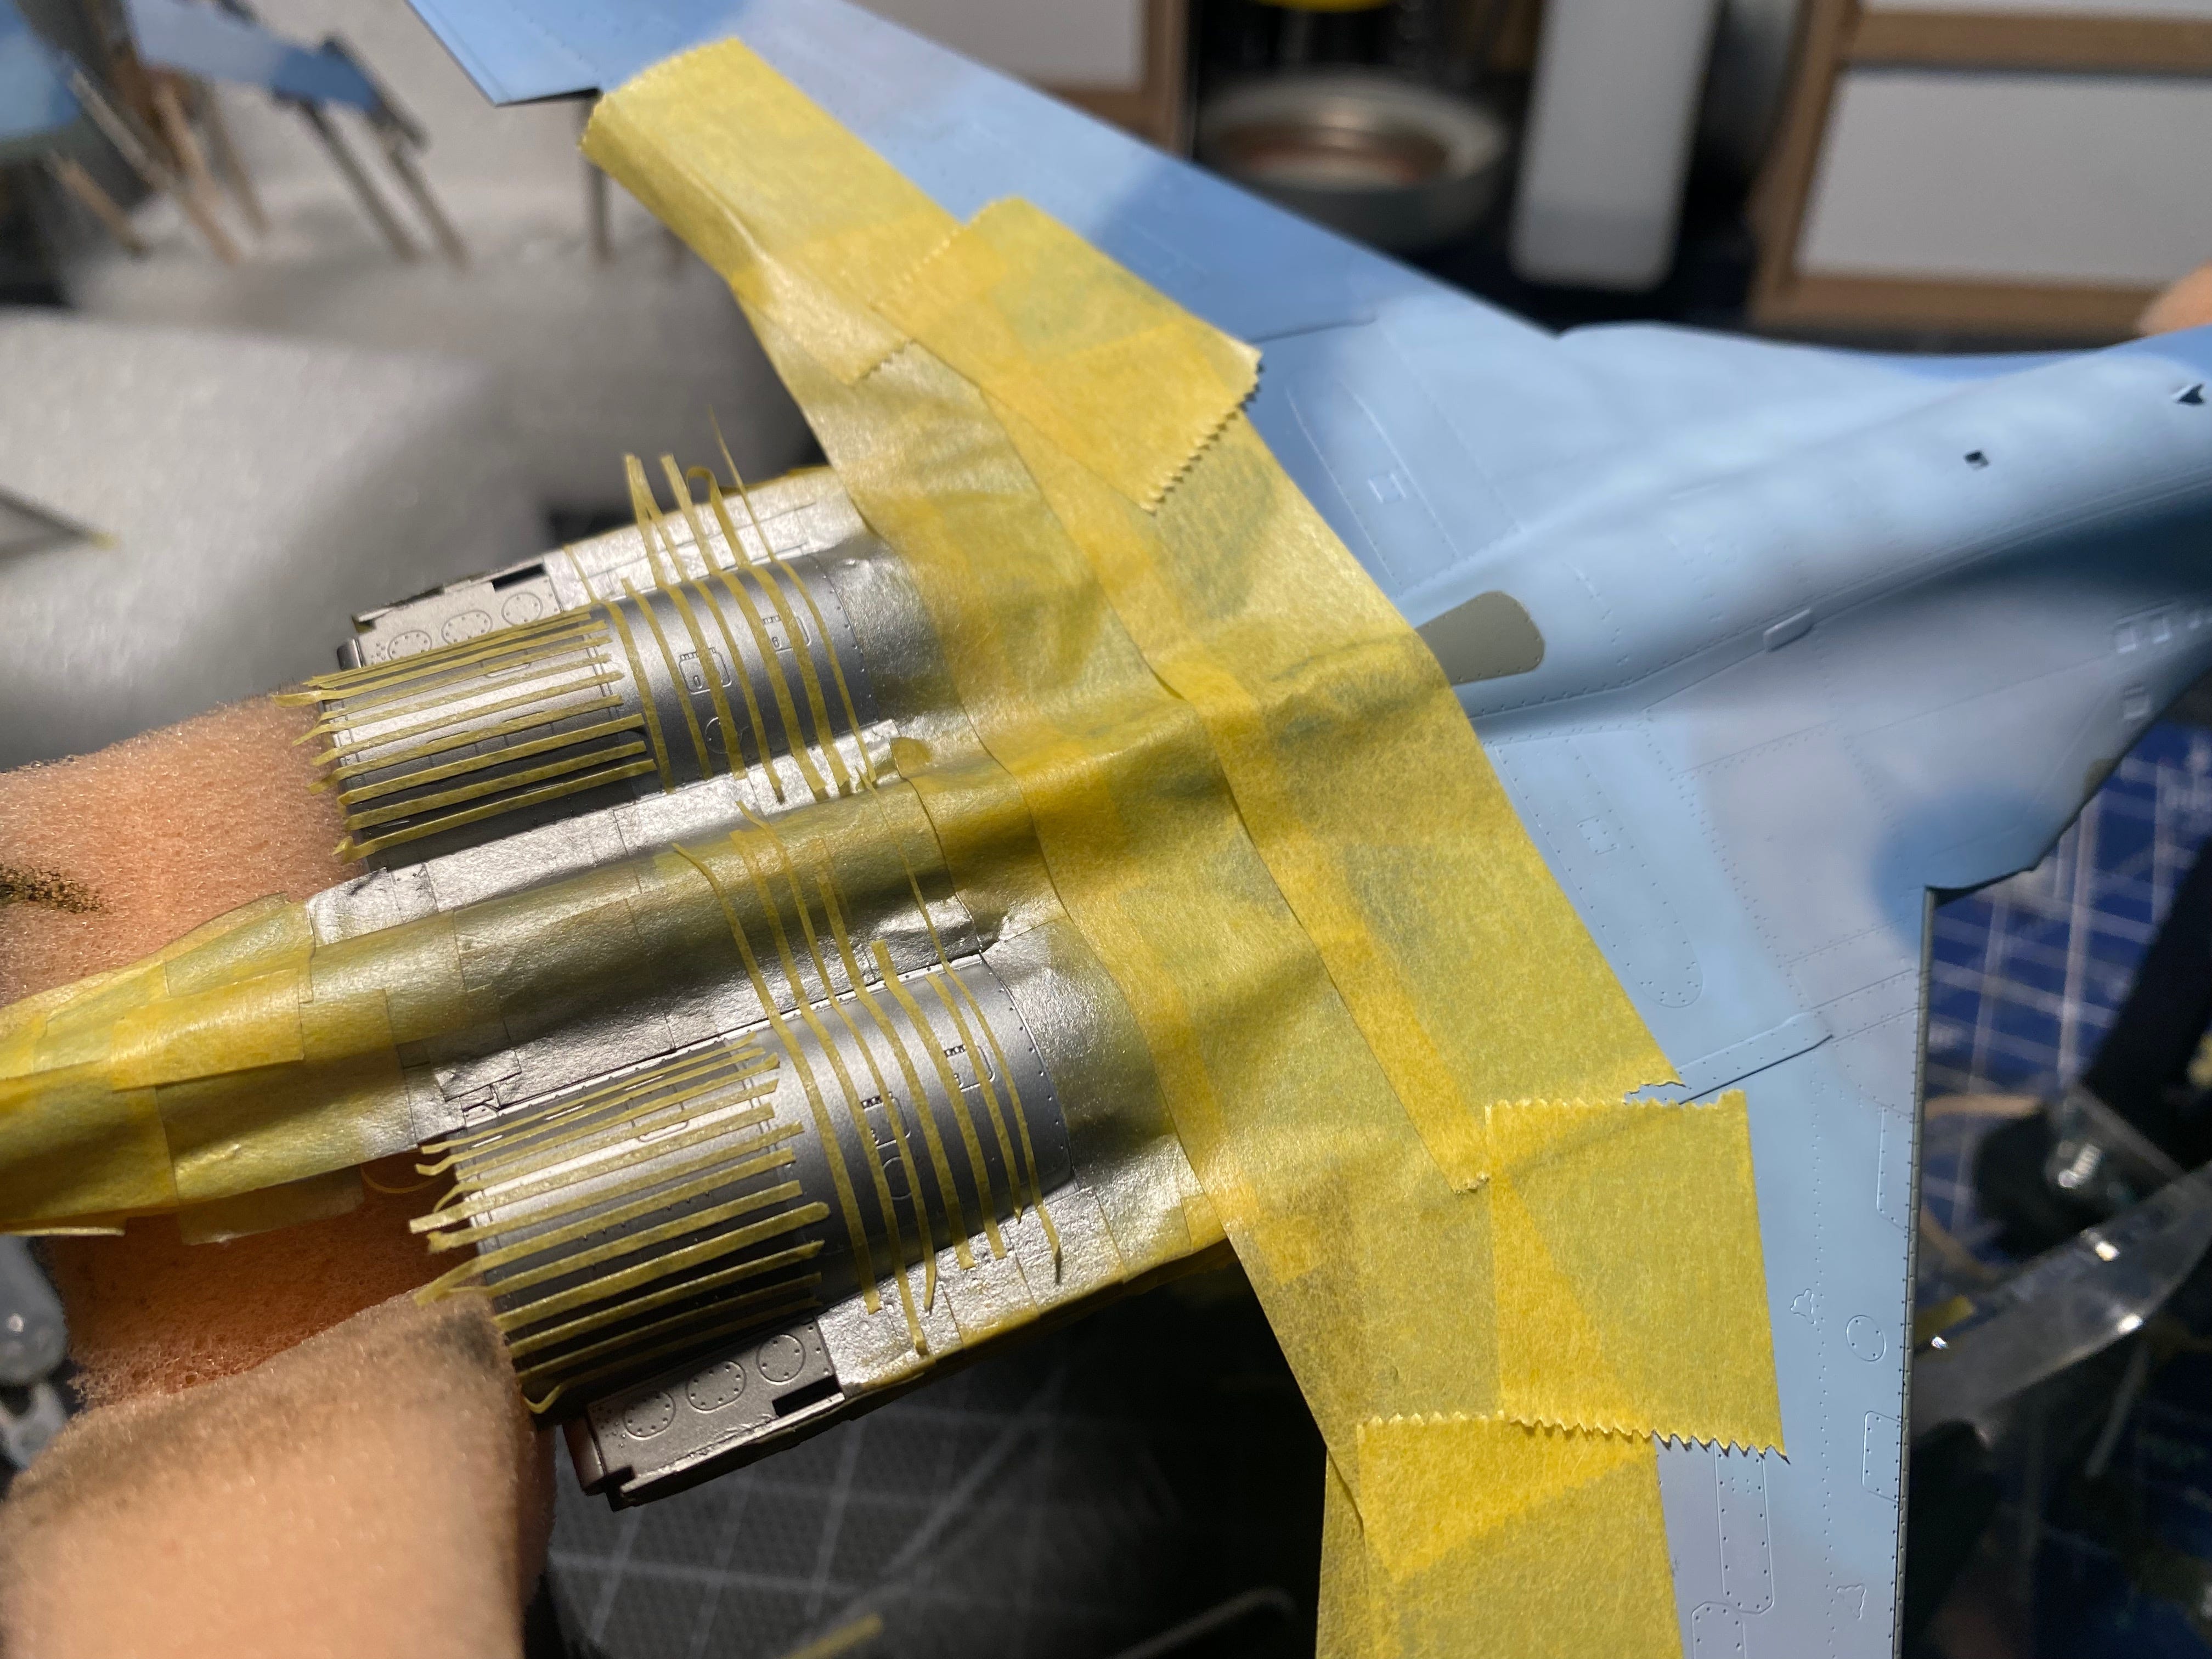
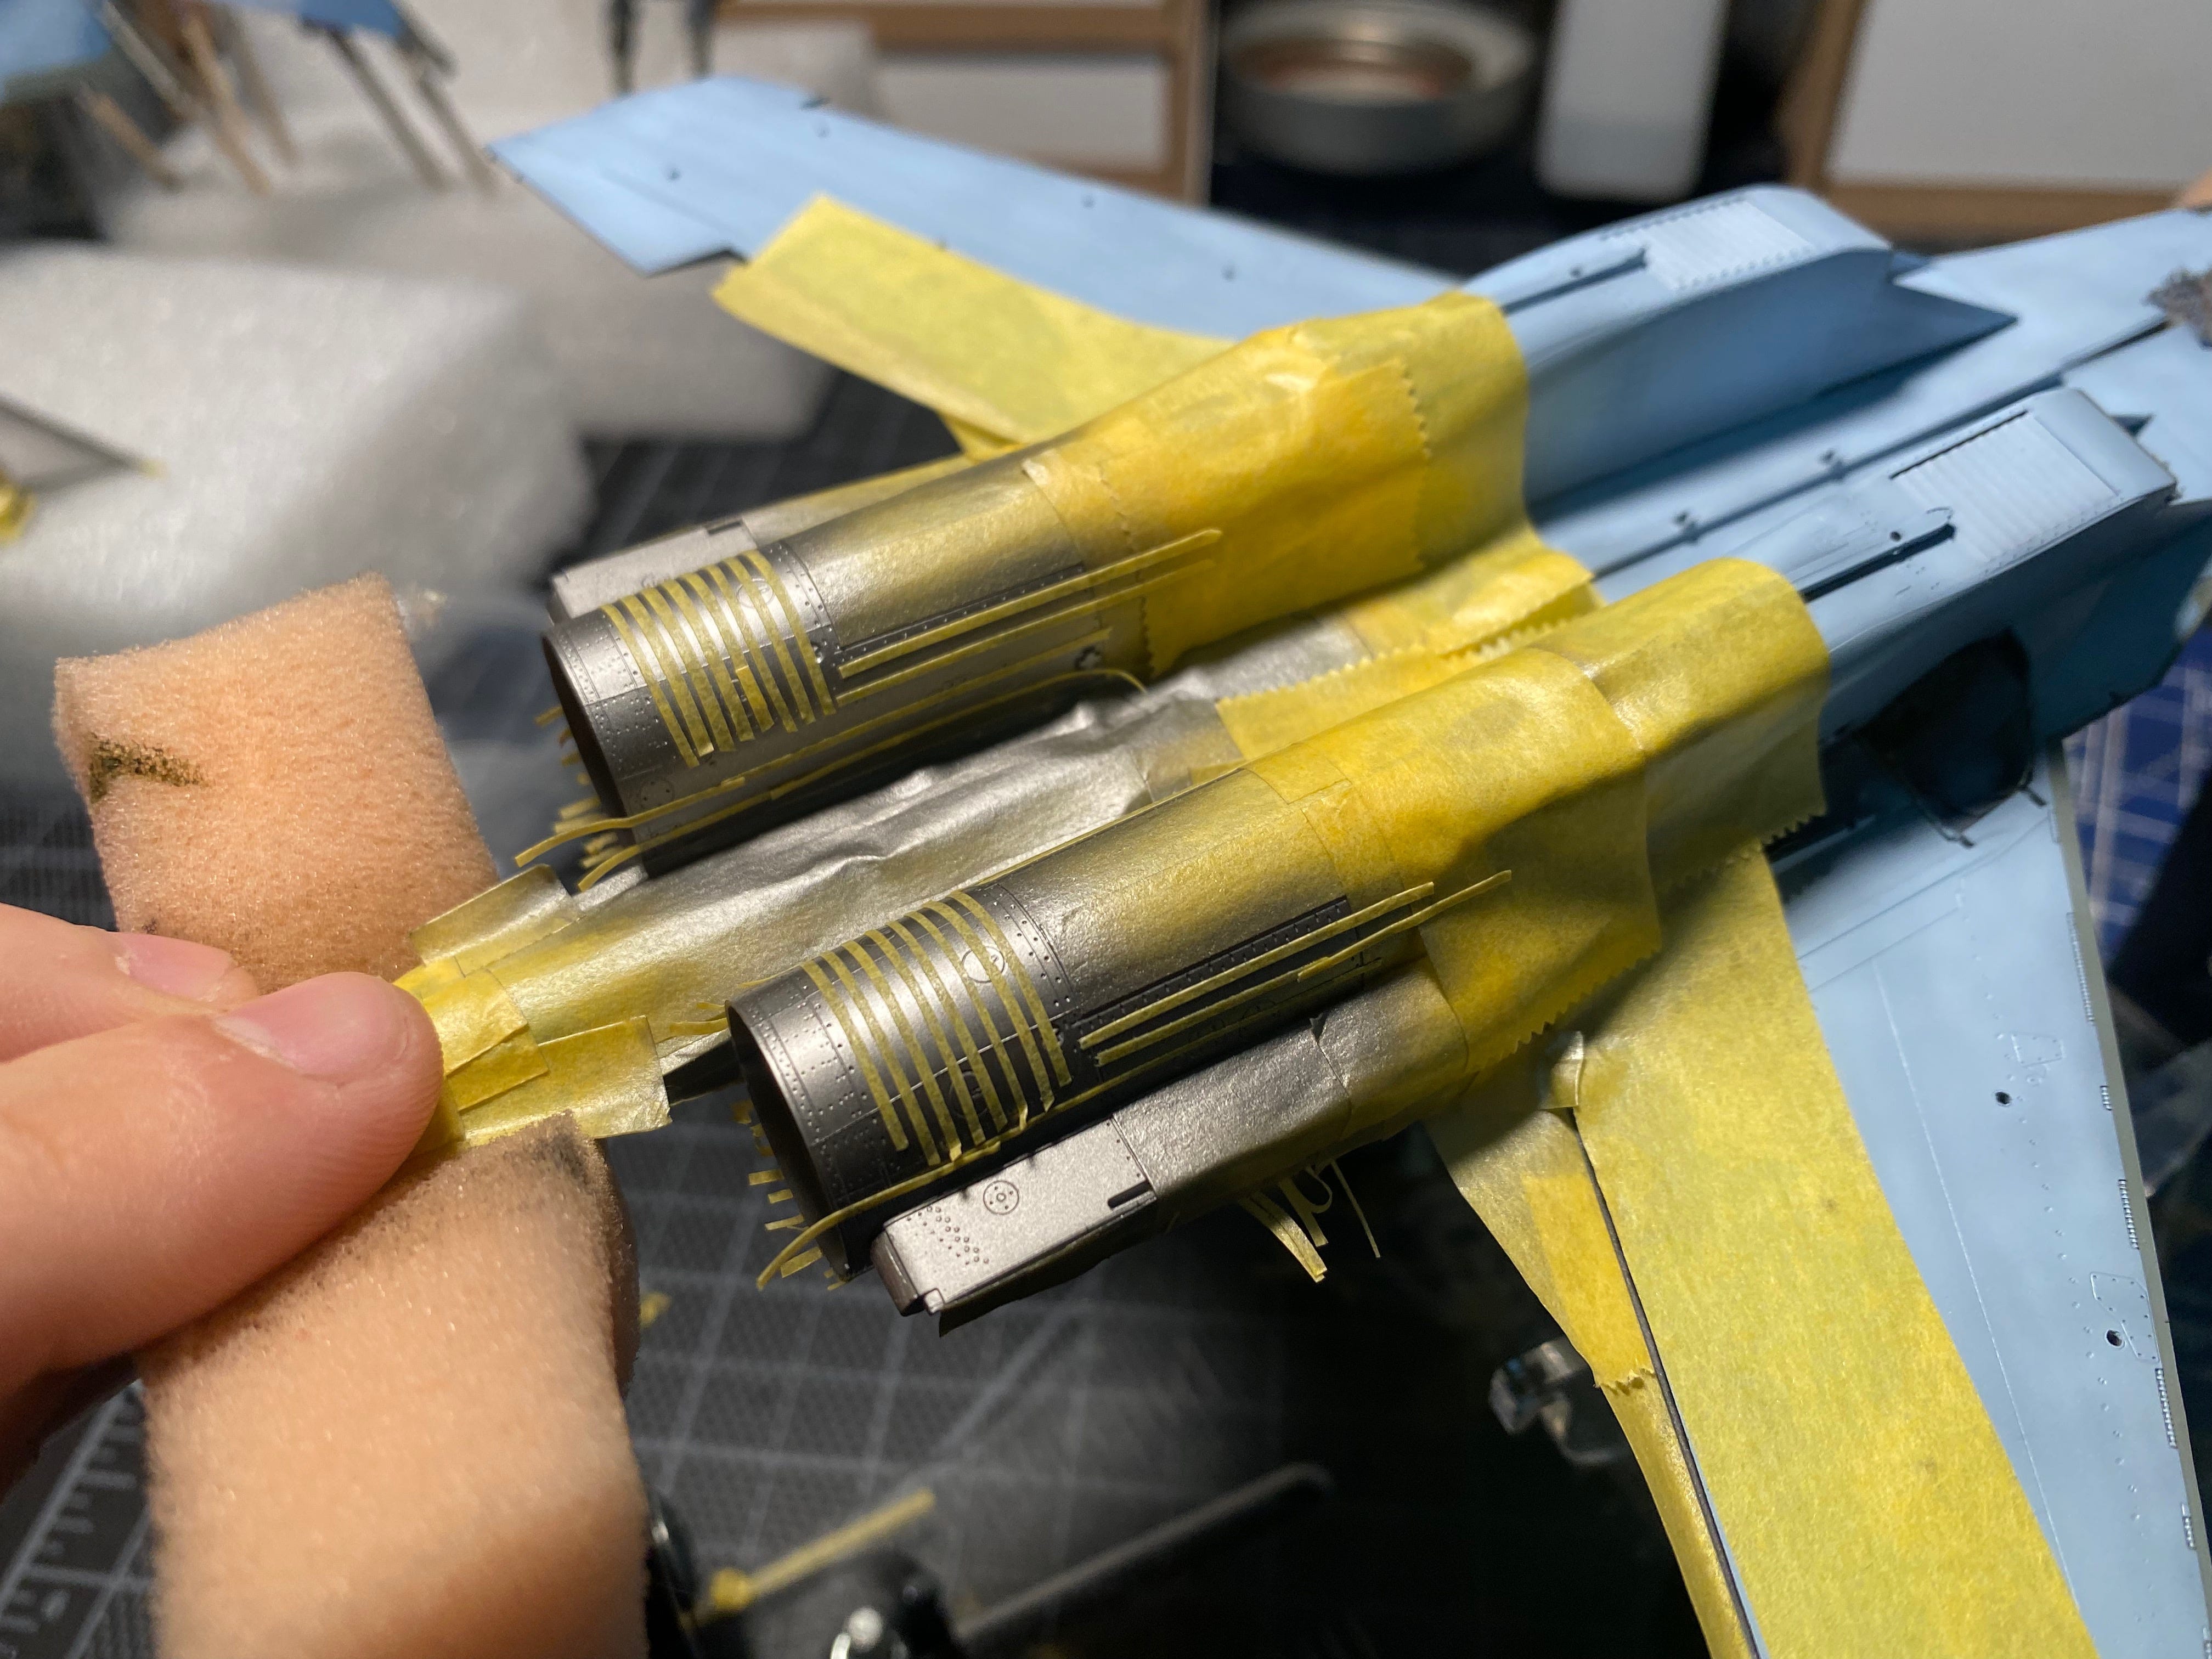
I use the tape as hard edges as I drag the pen back and forth a few times to get a visible line. You don’t have to be perfectly straight as on the real engines the lines have a ragged edge themselves. The upper silver panels with horizontal lines are done with the blue pen and the purple for the vertical lines, while the lower panel is down the brown lines going vertically and horizontal.
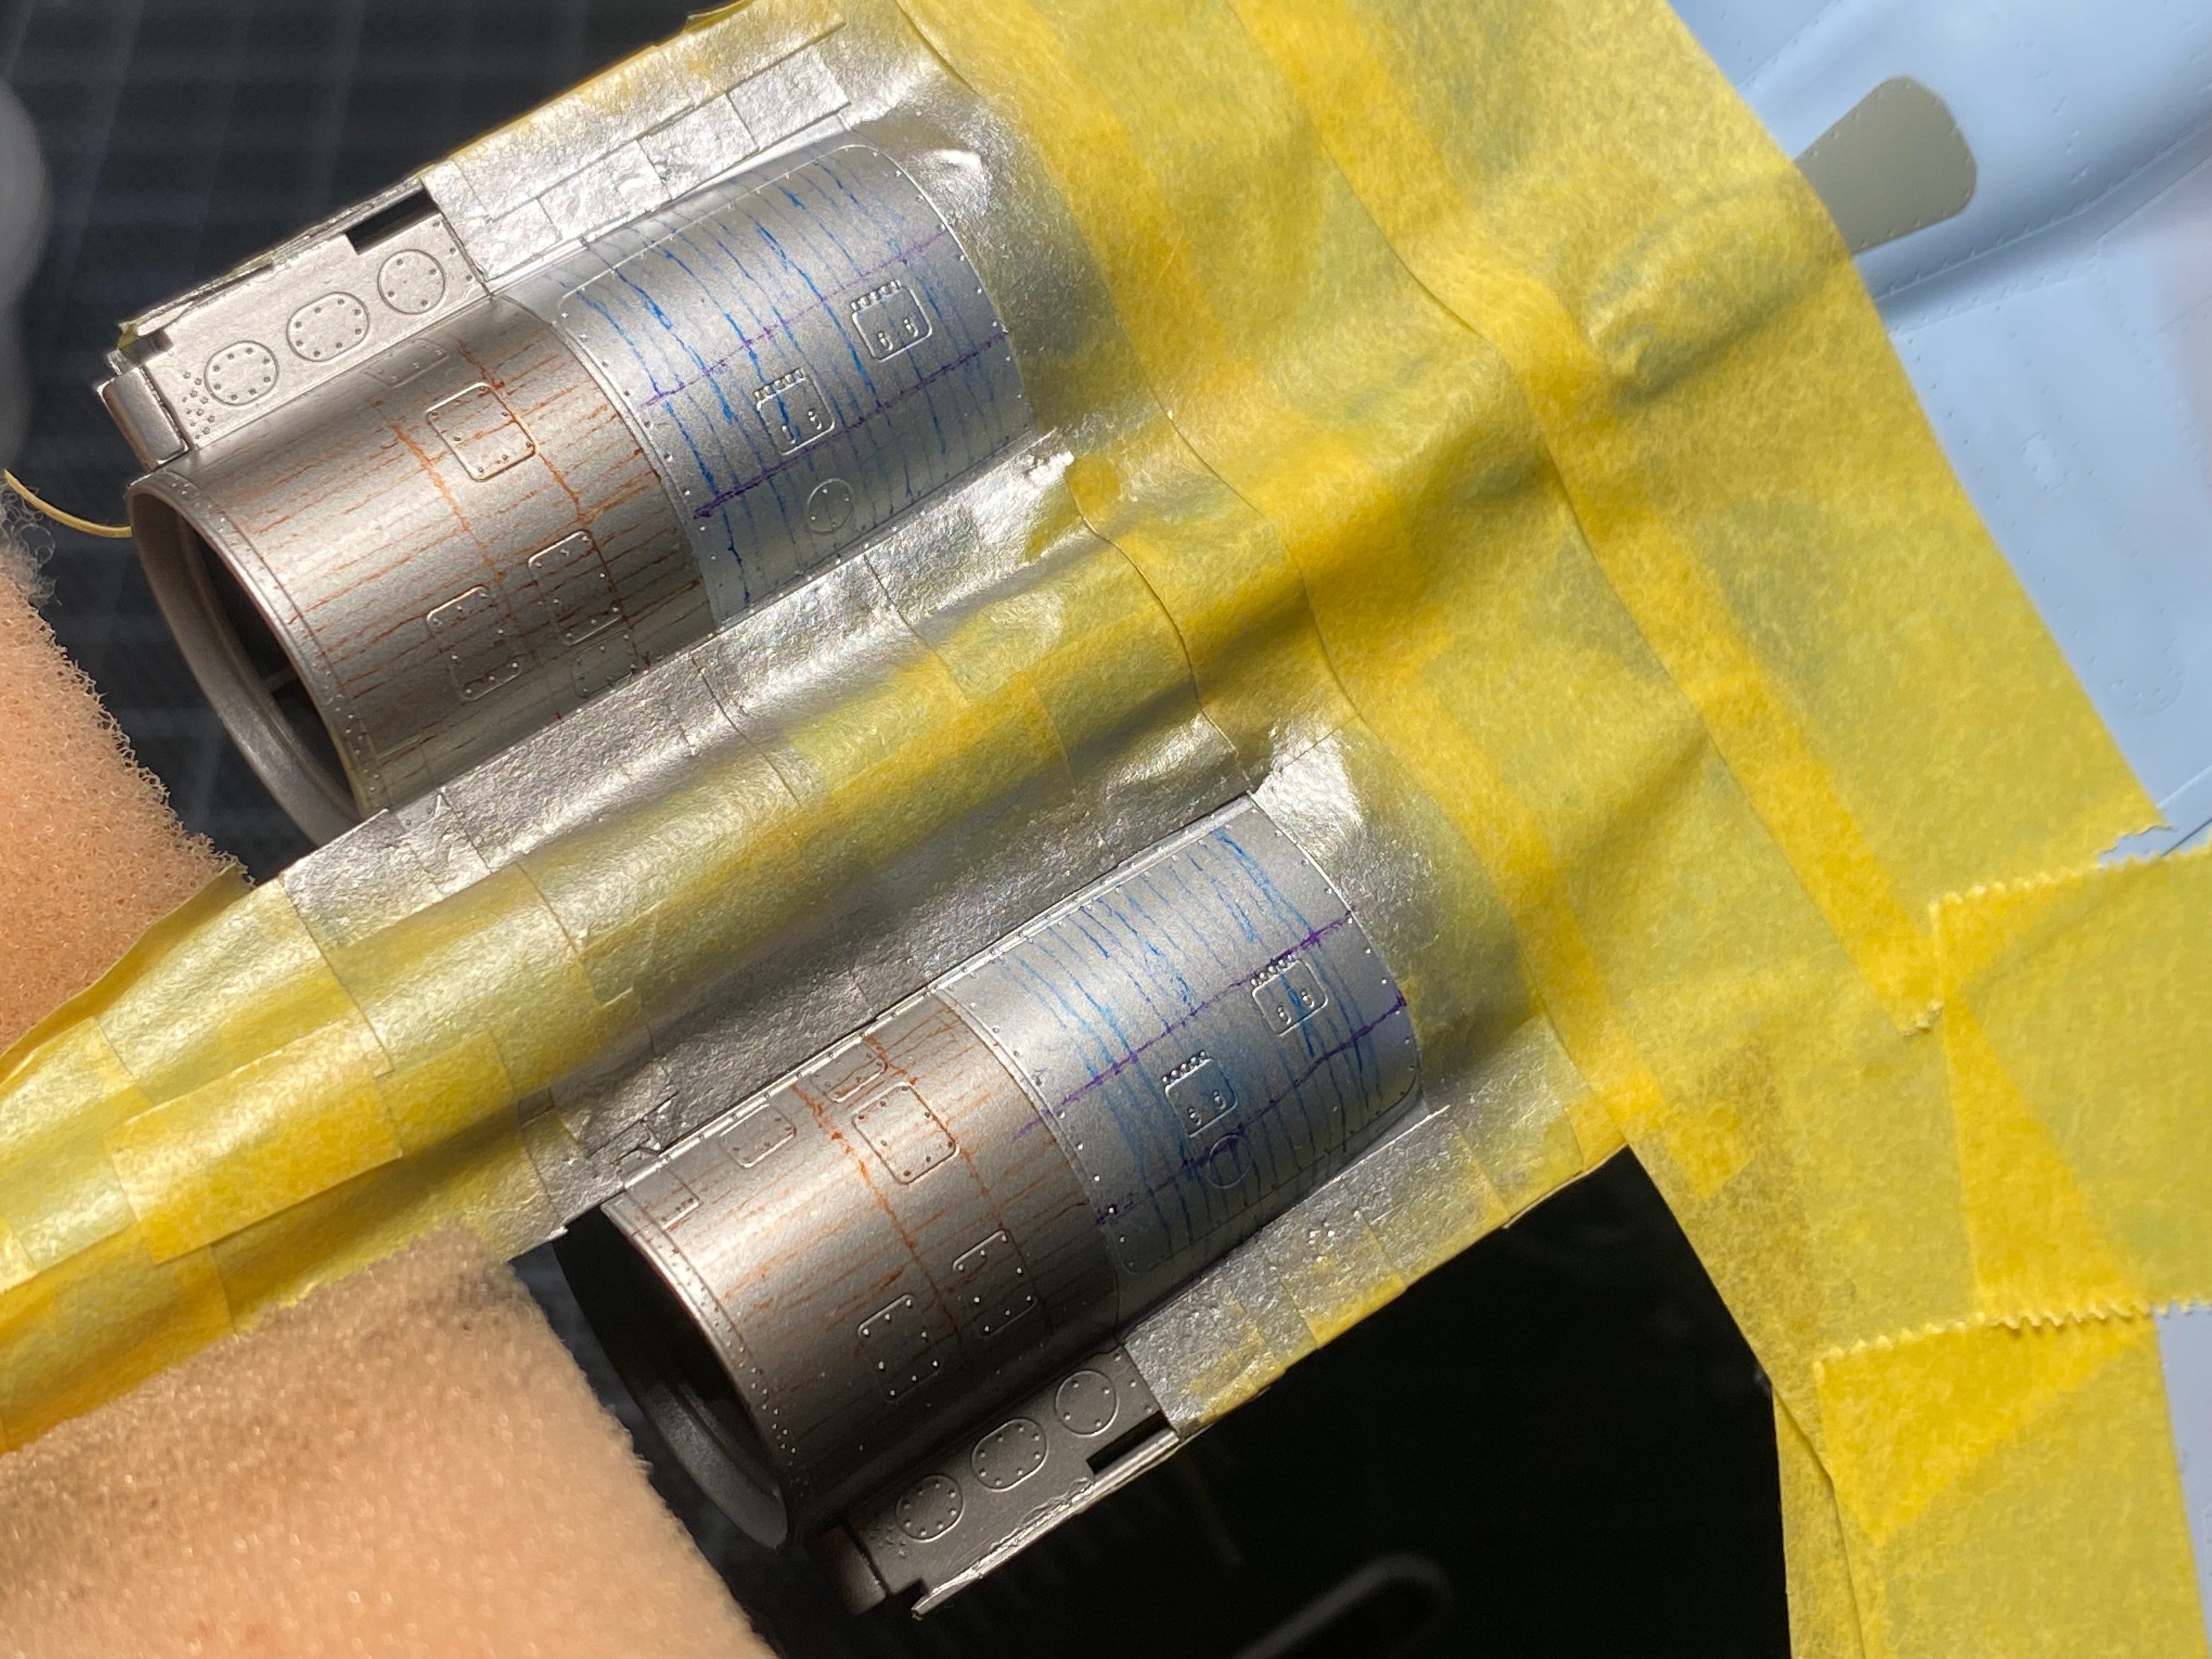
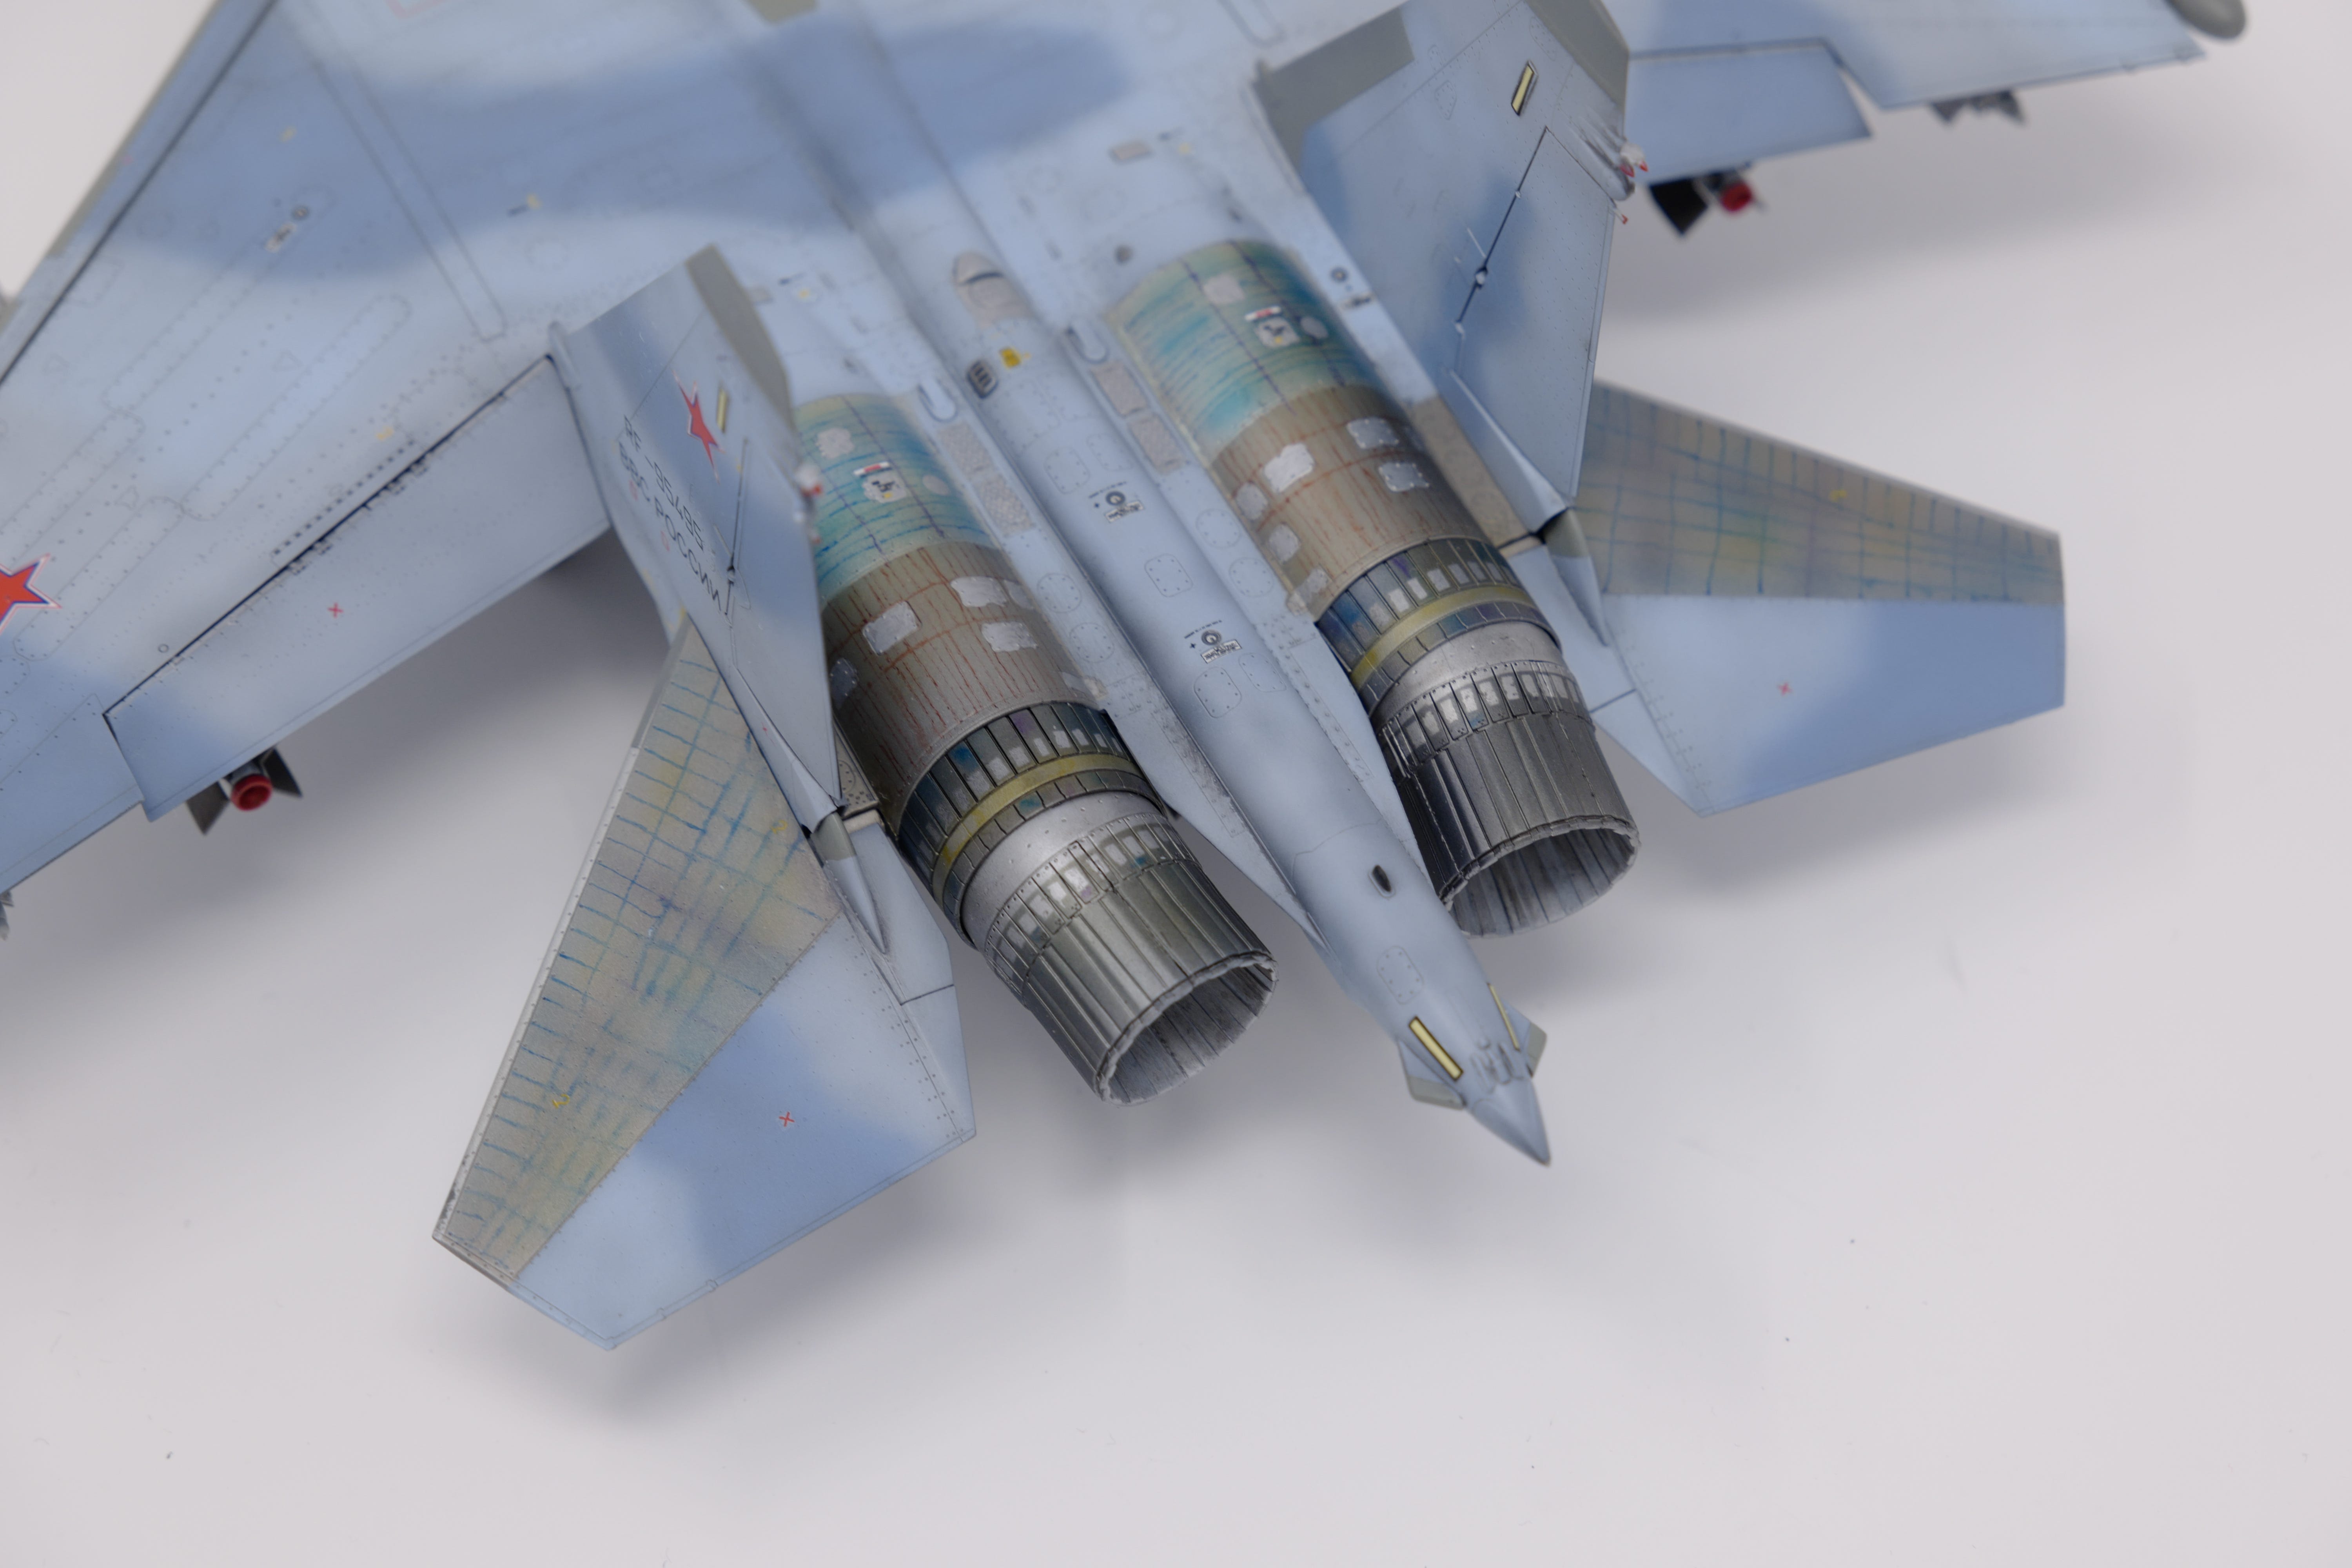
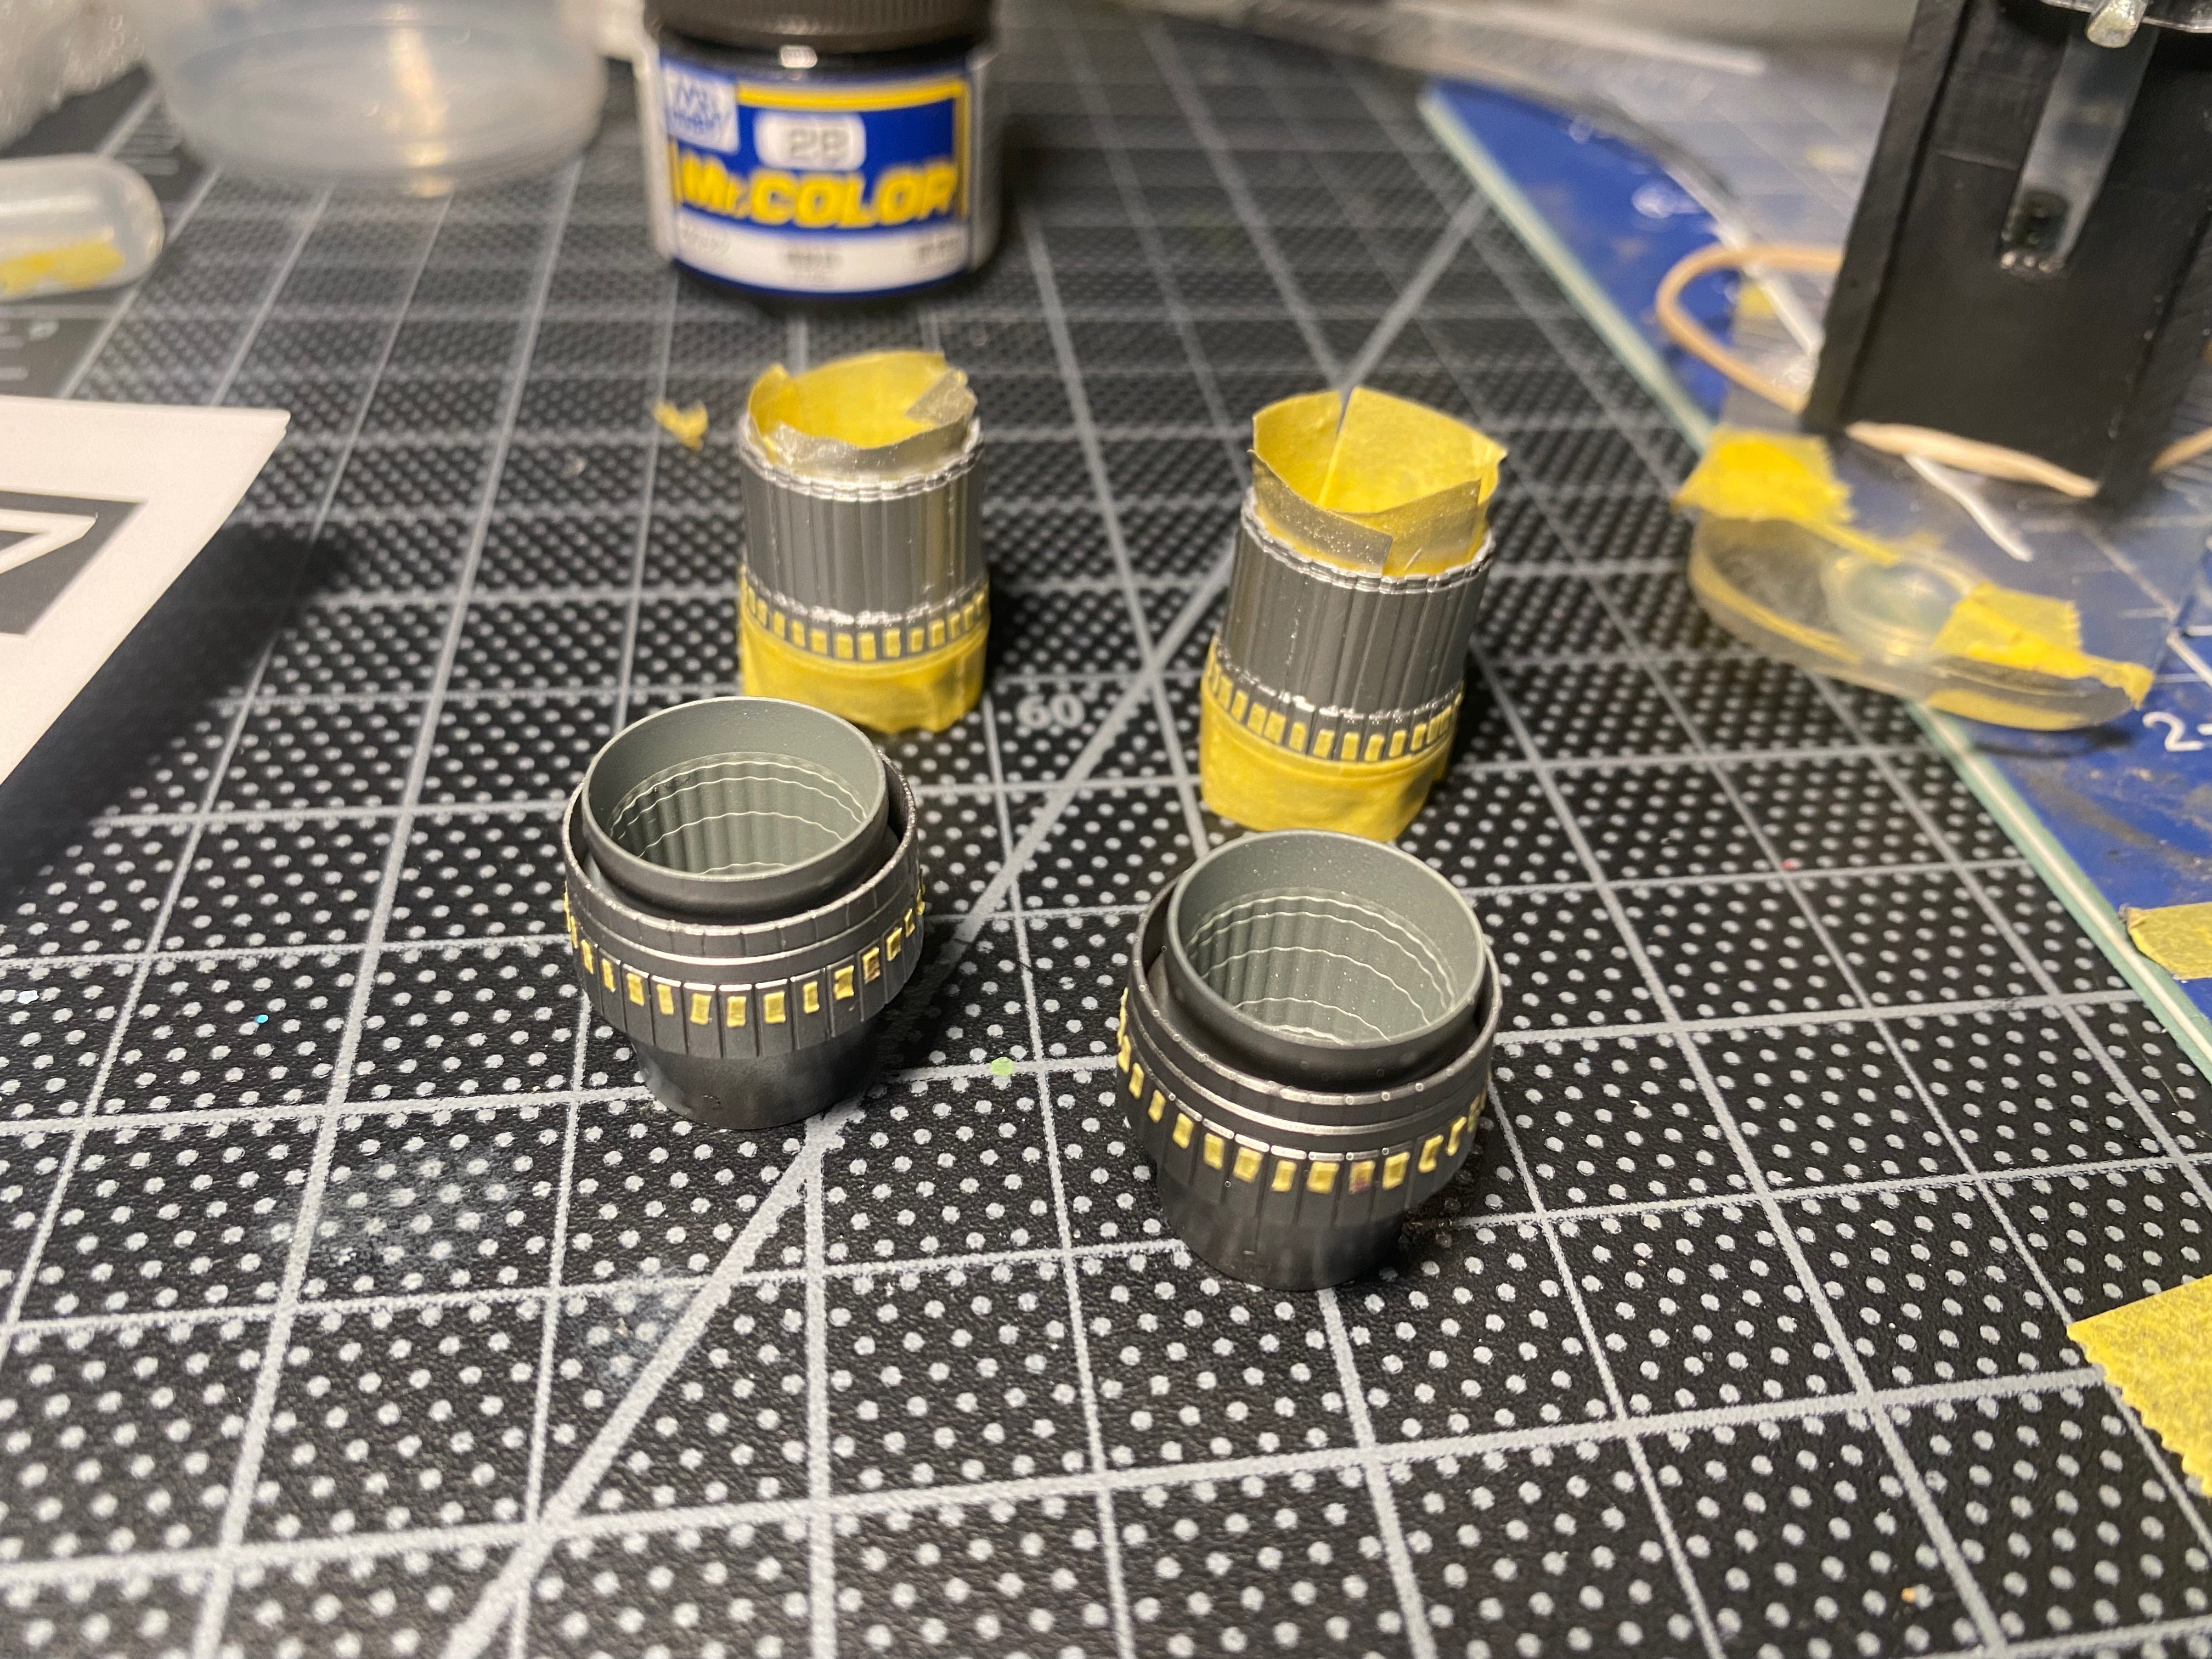
After removing the tape the results are immediate. This process of laying down tape and drawing the lines took a good few hours but will serve as a great base for the next steps. An advantage of the Micron pens is they can be easily wiped away if an error is made or blended if the lines are too strong. Following this the blue parts of the engine are sprayed with Tamiya clear blue with some highlights and panels accentuated with clear yellow. The brown panels are also sprayed with Tamiya clear orange. Individual panels are then hand painted with C8 silver to highlight the access panels which don’t have the heat staining pattern. The engine nozzles are also sprayed with mixes of these clear Tamiya paints to pick out certain panels as well as shading it
We can’t forget about the elevators at this point, while the Su-27’s elevators are completely painted the Su-35 leaves these titanium panels exposed. To emulate this they are also sprayed with the 1:1 C8 and C28 mix as a base. Next Tamiya smoke is used to highlight the cross framing, followed by Tamiya acrylic blue and yellow adding some more discoloration.
Using the blue Micron again draw more lines. I did these freehand as they follow the rivet pattern on the surface and with a steady hand you can save a lot of effort in masking.
These are done on the top and bottom surfaces. Of course with the nature this heat process no two example will be identical to another so you can take some liberty in the exact patterns and intensity of the color. Following all of this I sprayed all the metal pieces with generous coats of Mr Color GX 100 III as a clear varnish to seal in the lines we drew and all the different shading.
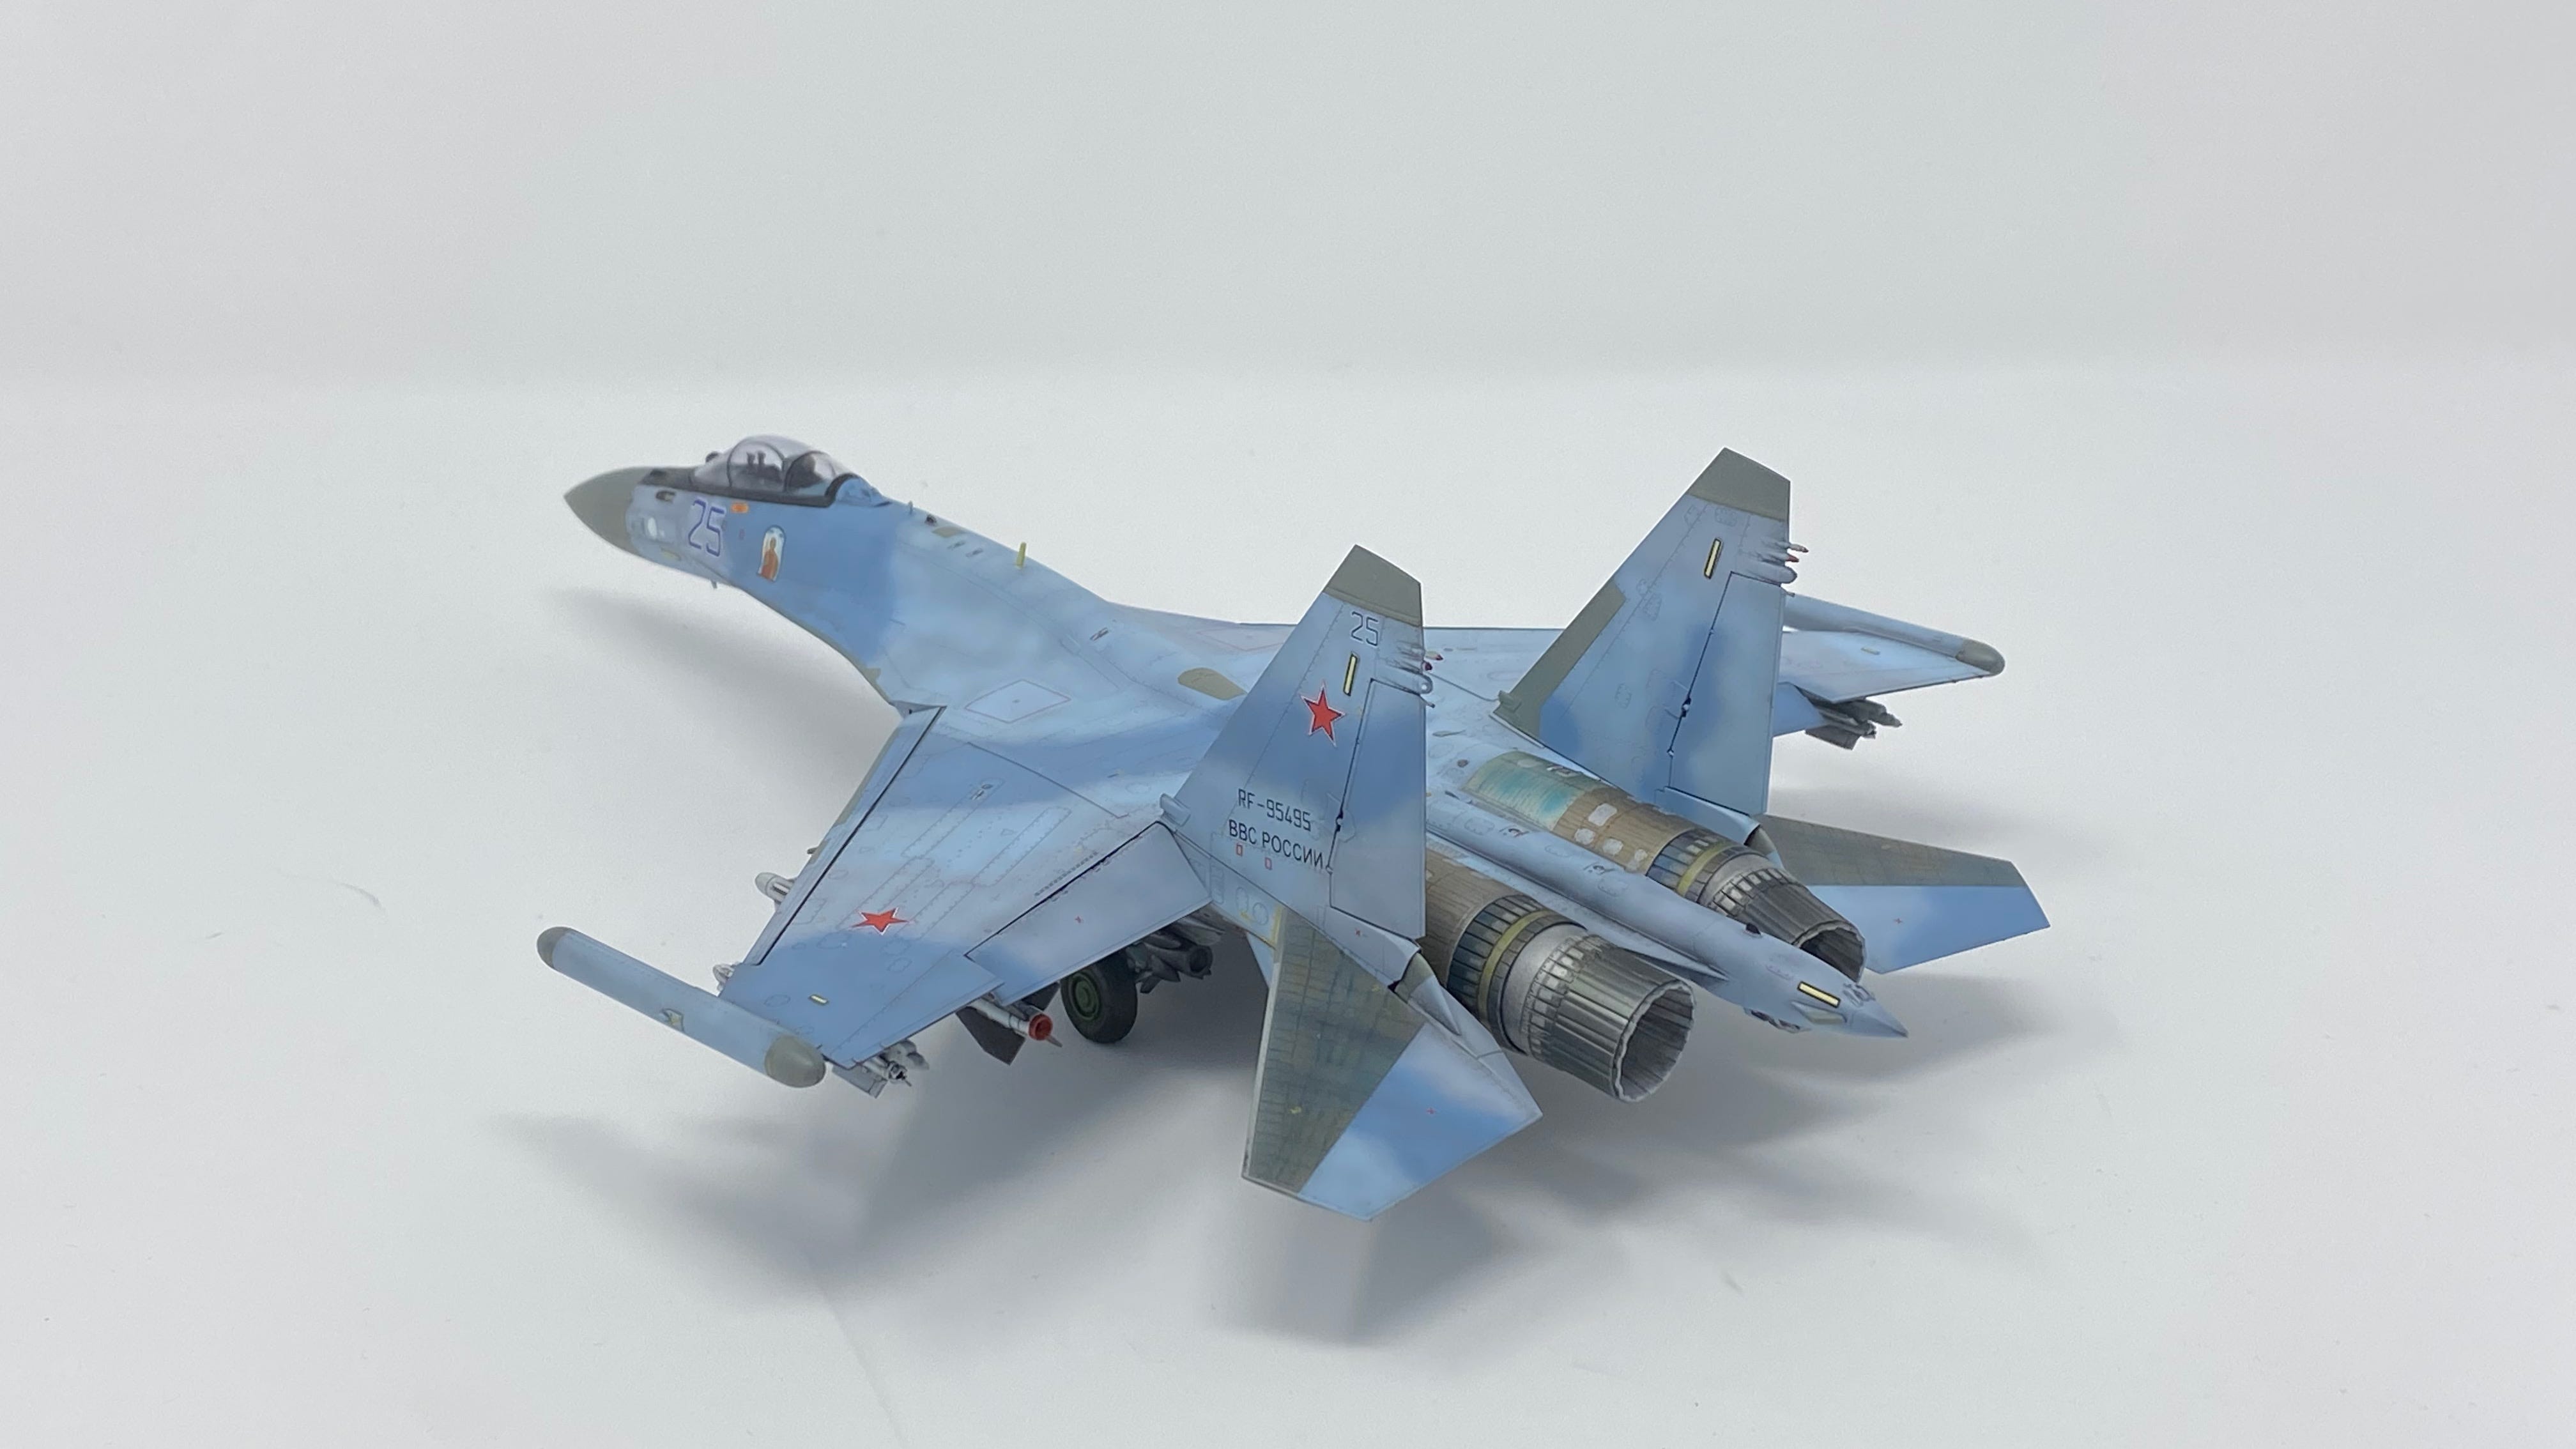
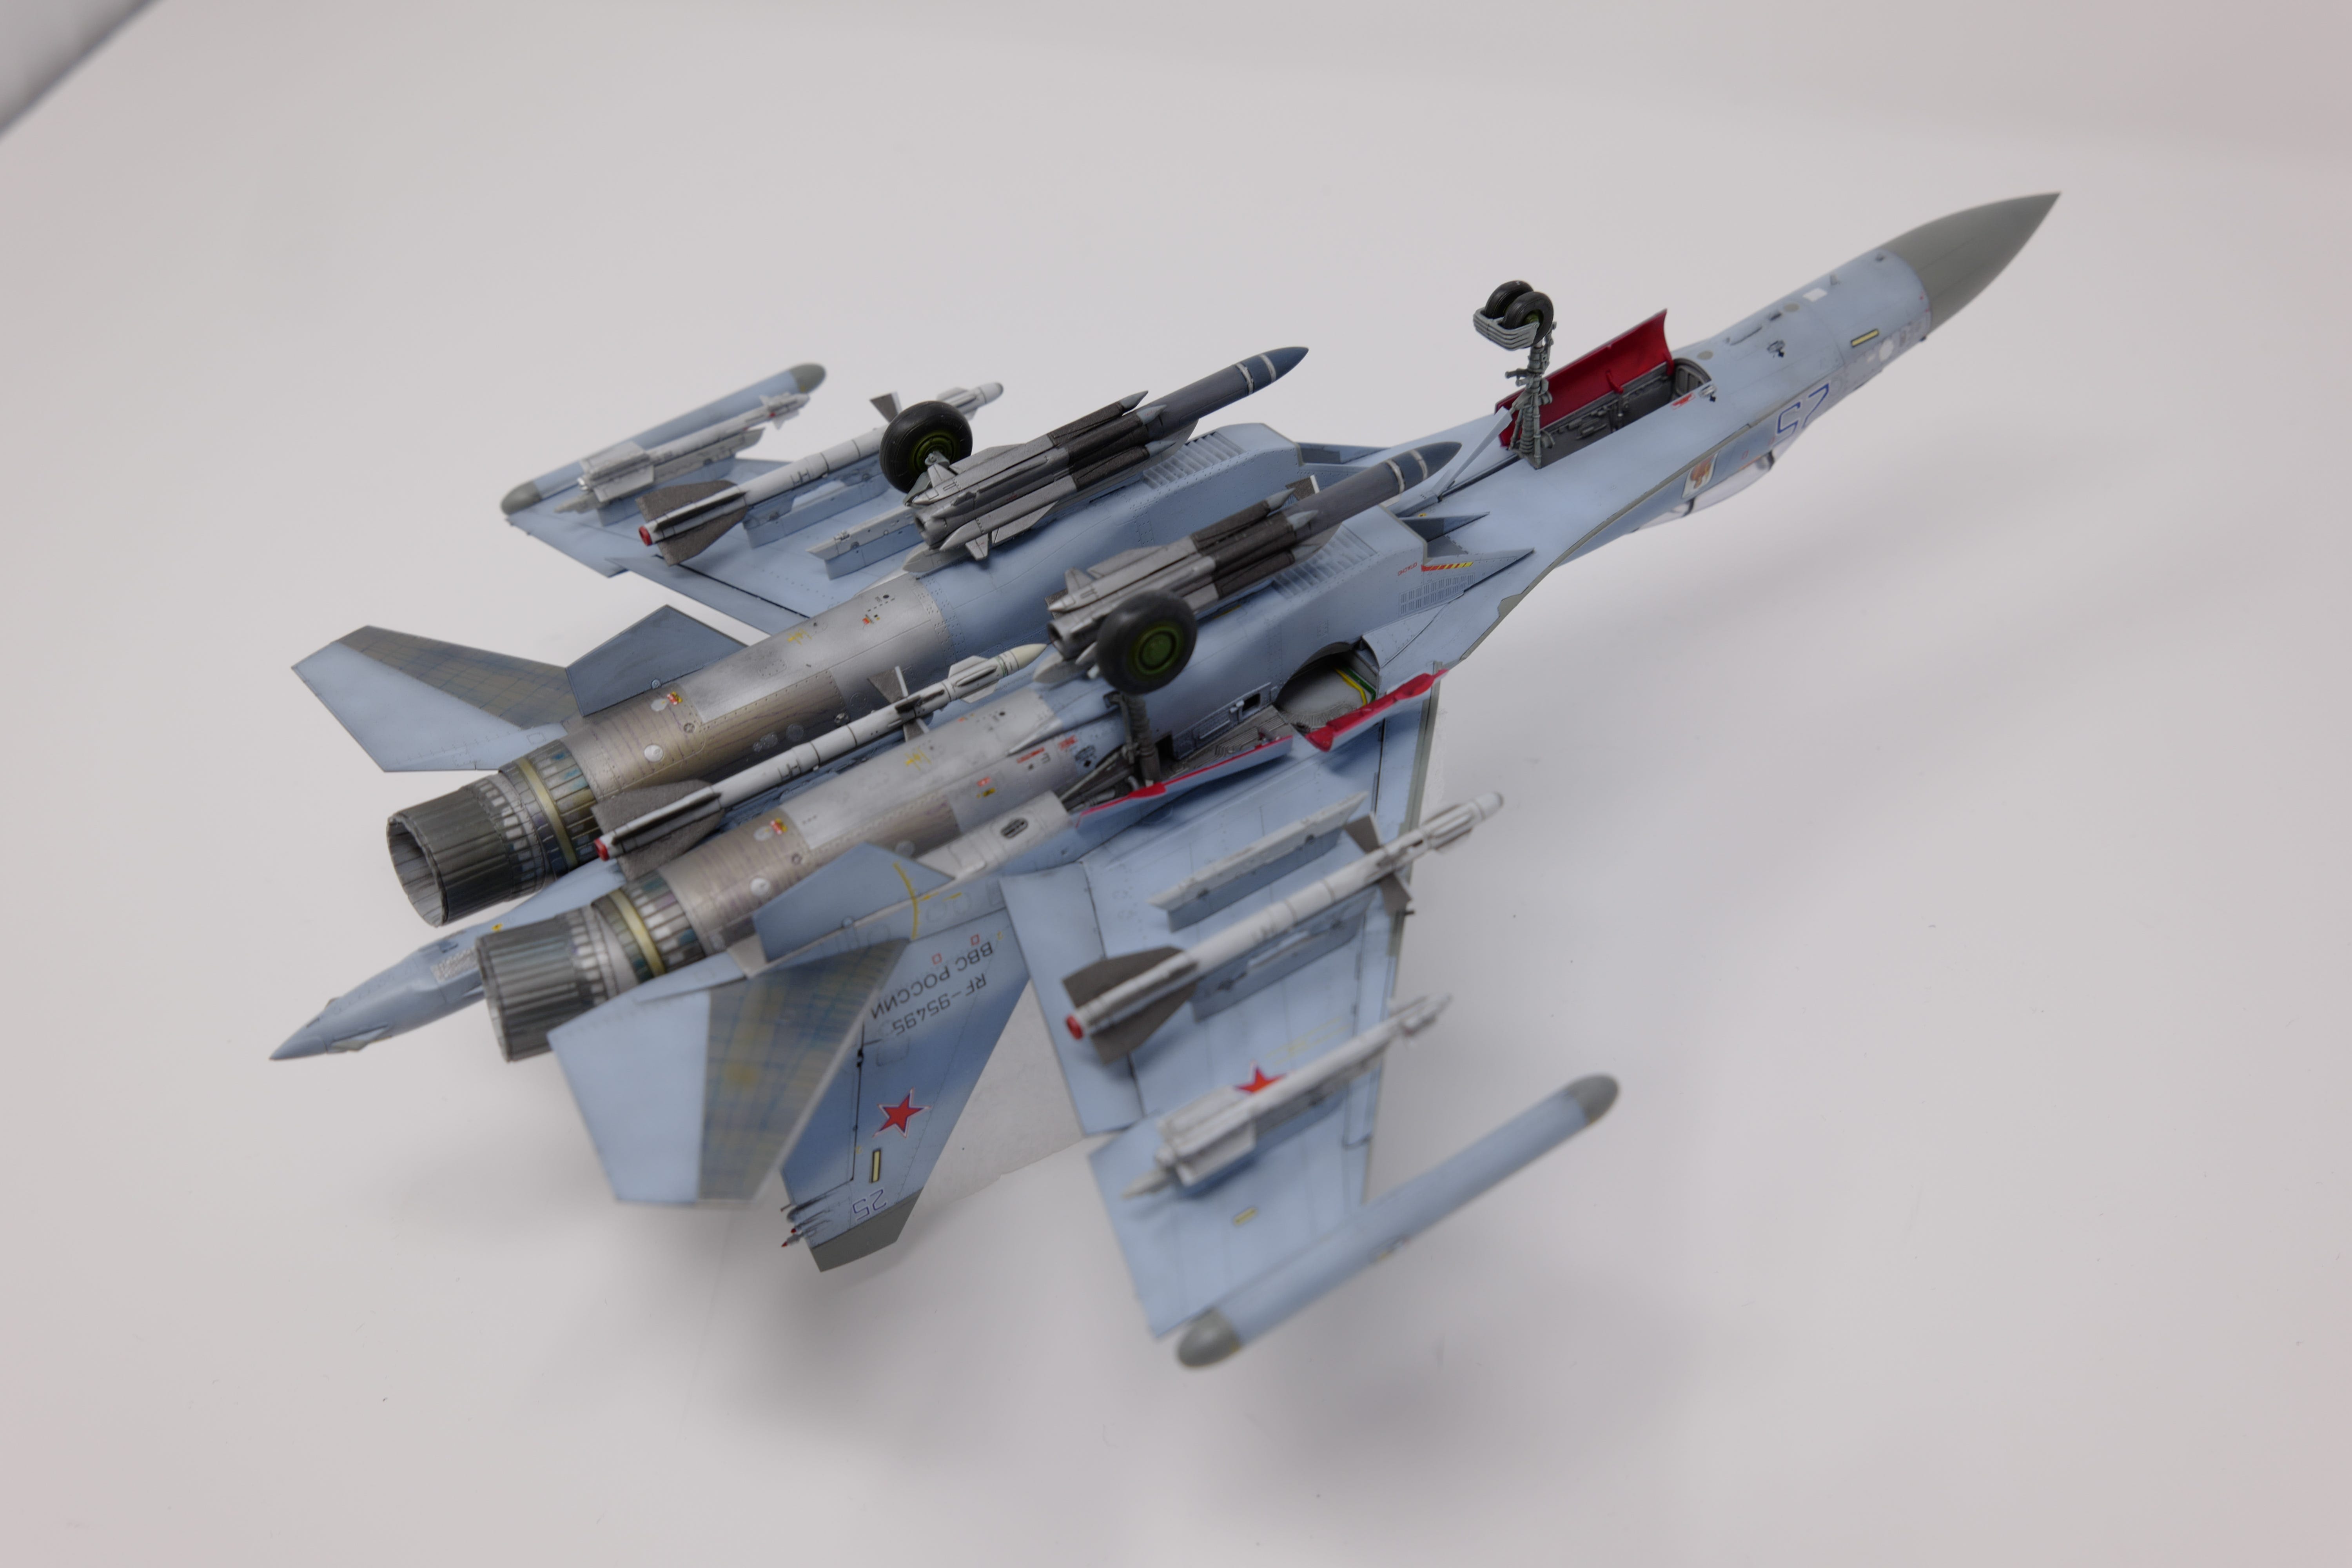
End Product
The rest of the build went smoothly without a hitch, the kit fell together and I had no last minute disasters, and I ended up extremely pleased with the final product. I must give credit to Japanese modeler @kevin021002 on twitter as an inspiration for this build, as well as the book Sukhoi Su-27 & 30/33/34/35: Famous Russian Aircraft by Yefim Gordon and Dmitriy Komissarov as their book has served as a bible for my past and future Su-27 family builds. Thank you all for reading and I hope this helped shed some light on this process and help de-mystify it for those unweary. Also if anyone does find a way to turn lead into gold as I mentioned above please comment, that would be a wonderful way to pay rent :)
-Ave
Su-35S ‘Blue 25’